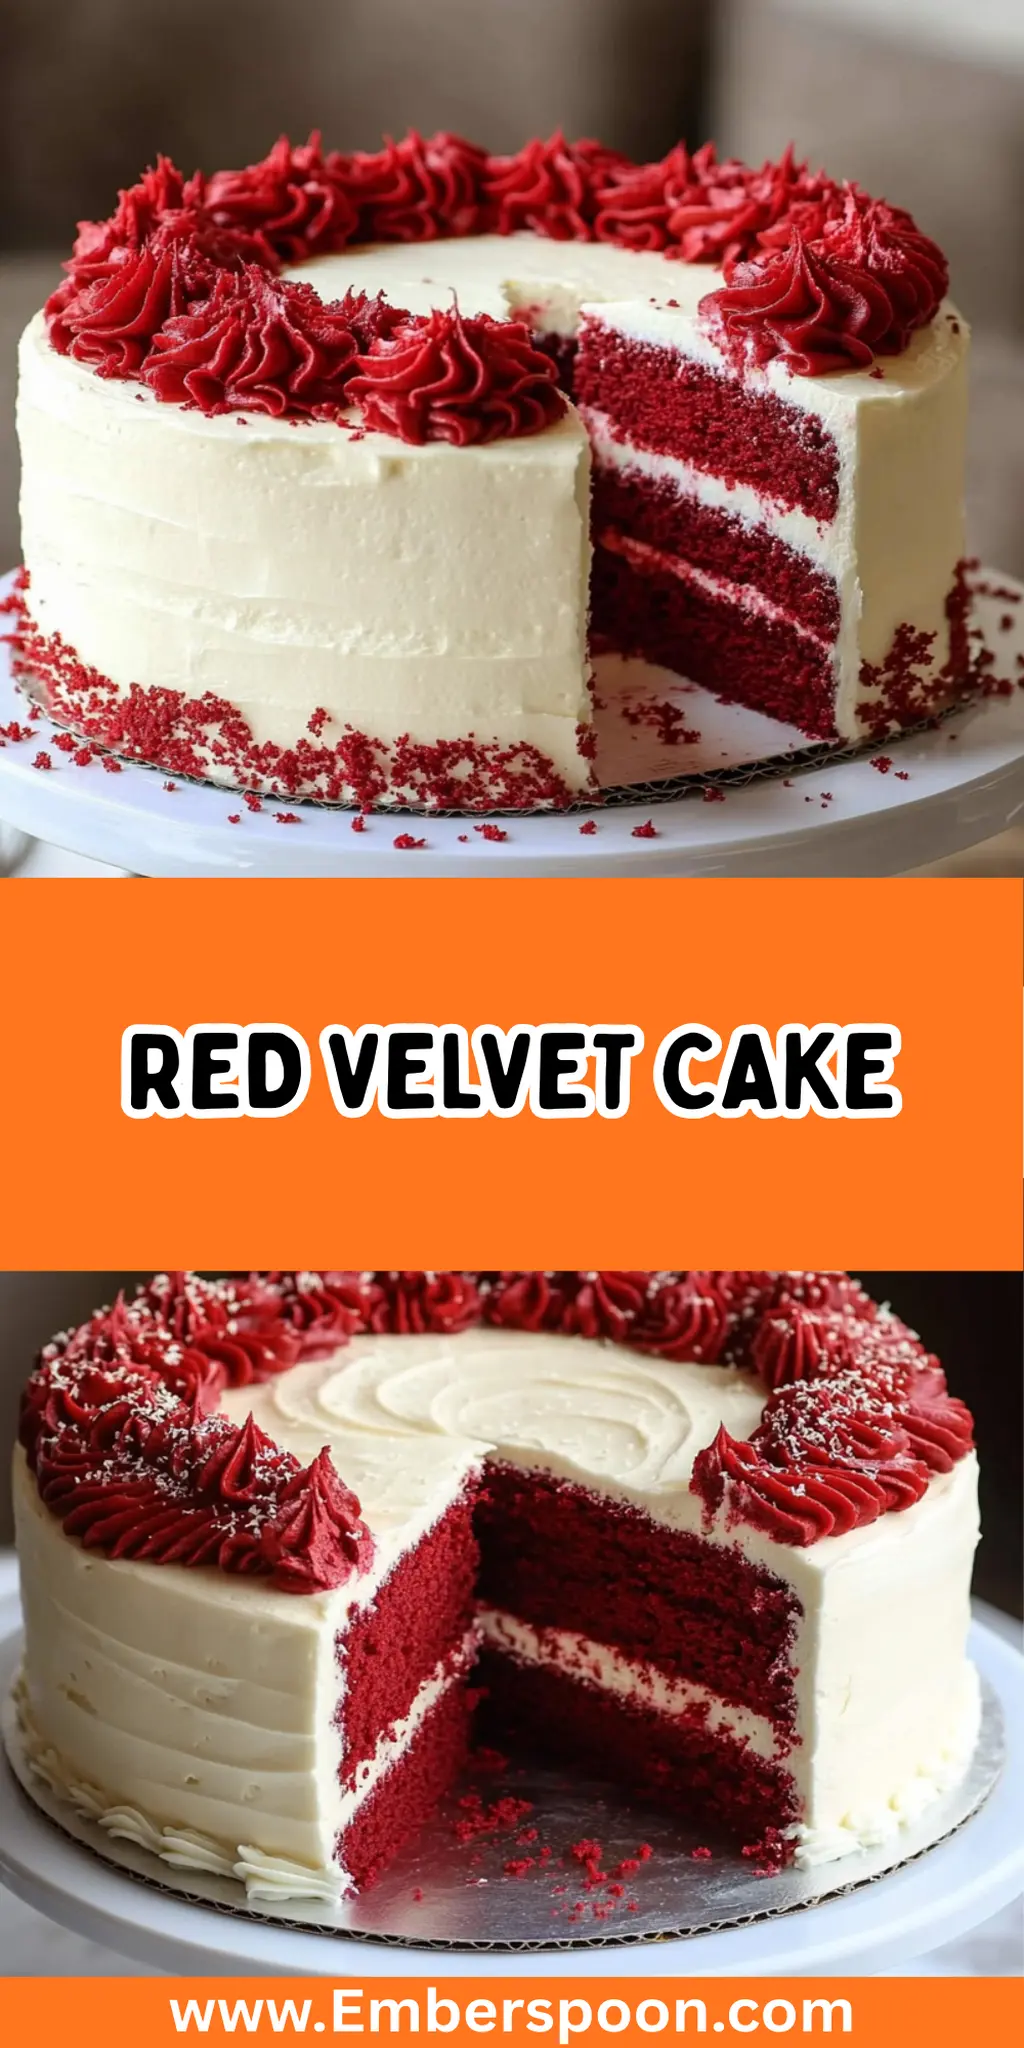
There’s something undeniably enchanting about the vibrant red hue of a Red Velvet Cake as it emerges from the oven, tempting you to dig in. The soft, moist layers, coupled with the rich cream cheese frosting, elevate this dessert from the ordinary to the extraordinary. One afternoon, while rummaging through my pantry, I decided it was finally time to conquer this beloved classic, and I haven’t looked back since.
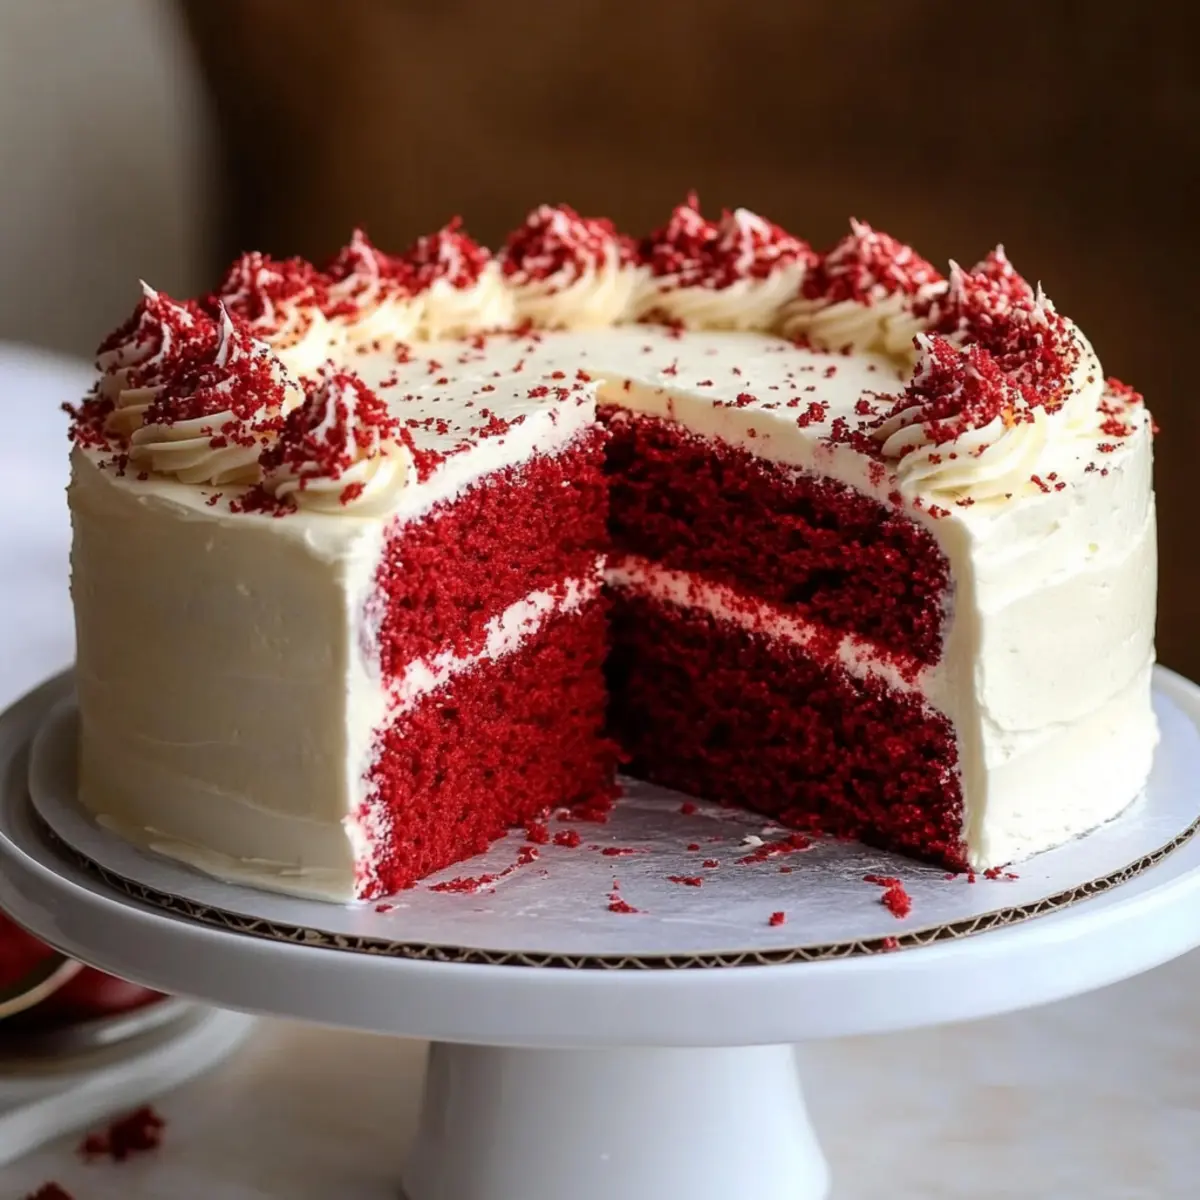
Whether it’s for a birthday celebration, a cozy gathering, or simply a treat to chase away the weeknight blues, this cake never fails to impress. You’ll find that the balance of flavors—from the slight tang of buttermilk to the subtle hint of cocoa—makes every bite an experience to savor. Packed with whimsical charm and a touch of indulgence, this Red Velvet Cake is your new go-to recipe for capturing hearts and taste buds alike. Join me as we create this sensational dessert that’s easier to make than you might think!
Why You'll Love This Red Velvet Cake
- This Red Velvet Cake is incredibly easy to make, allowing both novice and experienced bakers to enjoy creating a stunning dessert.
- The flavor combination of rich cream cheese frosting and moist red velvet layers is truly irresistible, making each slice a delightful treat.
- Its vibrant color makes it visually captivating, perfect for any special occasion or gathering.
- Whether you’re serving it at a birthday party or enjoying a cozy night in, this cake is bound to be a crowd-pleaser that brings smiles to everyone around the table.
- The recipe is also time-saving, taking just about an hour from start to finish, so you can enjoy the fruits of your labor quickly.
- You’ll undoubtedly find yourself making this enchanting Red Velvet Cake again and again for its charm and deliciousness.
Red Velvet Cake Ingredients
• Discover everything you need for a delicious Red Velvet Cake!
For the Cake
- All-purpose flour – Essential for structure; sift it to avoid lumps.
- Granulated sugar – Adds sweetness; make sure it’s well combined for an even texture.
- Baking soda – Creates lift and lightness; ensure it’s fresh for best results.
- Salt – Balances sweetness and enhances flavors; don’t skip!
- Cocoa powder – Provides a hint of chocolate flavor; use unsweetened for a deeper taste.
- Vegetable oil – Keeps the cake moist and tender; can be replaced with melted butter for added flavor.
- Buttermilk – Adds richness and tang; substitute with yogurt mixed with milk for a similar effect.
- Large eggs – Helps bind and leaven the cake; use room temperature for better mixing.
- Red food coloring – Gives that iconic color; gel coloring performs best for vibrancy.
- Vanilla extract – Infuses a lovely warm aroma; use pure extract for the best flavor.
- White vinegar – Reacts with baking soda for a fluffier cake; don’t skip for that extra lift!
For the Cream Cheese Frosting
- Cream cheese – Provides that signature flavor; let it soften to make mixing easier.
- Unsalted butter – Adds creaminess and enhances texture; softening it helps achieve the ideal consistency.
- Powdered sugar – Sweetens and thickens the frosting; sift it to ensure a smooth blend.
- Vanilla extract – Enhances the frosting’s flavor; a touch of almond extract can add a nice twist.
- Milk – Helps achieve the desired consistency; add gradually to prevent over-thinning.
How to Make Red Velvet Cake
-
Preheat your oven to 350°F (175°C). This will ensure that your cake bakes evenly and rises beautifully. Greasing and flouring the pans helps to prevent sticking, making it easier to remove the cakes later.
-
Sift together the flour, sugar, baking soda, salt, and cocoa powder in a large mixing bowl. This step aerates the dry ingredients, promoting a lighter texture in your Red Velvet Cake.
-
Whisk the vegetable oil, buttermilk, eggs, red food coloring, vanilla extract, and vinegar in another bowl until well combined. The vibrant color will start to appear, setting the stage for that iconic look!
-
Combine the wet ingredients with the dry ingredients, stirring gently until just incorporated. Take care not to overmix; a few lumps are perfectly fine for a tender crumb.
-
Pour the batter evenly into the prepared cake pans. You want the layers to be equal in height, ensuring an even bake and a professional look.
-
Bake for 30–35 minutes or until a toothpick inserted in the center comes out clean. The cake should spring back when gently pressed and have a lovely aroma filling your kitchen.
-
Cool the cakes in the pans for about 10 minutes before transferring them to a wire rack. Allow them to cool completely, which is crucial for proper frosting.
-
Beat the softened cream cheese and butter together in a mixing bowl until smooth and creamy. This creates the lush base for your delicious frosting.
-
Add the powdered sugar gradually, mixing until fluffy and well-combined. Add the vanilla extract for an extra burst of flavor and mix again for a heavenly frosting.
-
Adjust the consistency of the frosting if necessary. If it’s too thick, add milk one tablespoon at a time until you achieve that creamy, spreadable texture.
-
Level the tops of the cooled cakes with a knife if needed. This step helps ensure your layers stack neatly without leaning.
-
Assemble by placing one cake layer on a serving plate. Spread a generous layer of cream cheese frosting on top, then gently place the second layer on top and frost the top and sides of the cake.
-
Decorate with additional frosting, sprinkles, or fresh berries, if desired. This optional touch adds a fun flair to your gorgeous cake!
-
Slice the cake and serve at room temperature. Enjoy the vibrant layers and delightful flavors of your homemade Red Velvet Cake; it’s sure to be a hit!
Optional: Top with fresh berries for a burst of color and flavor.
Exact quantities are listed in the recipe card below.
Red Velvet Cake Variations
Feel free to get creative and make this enchanting Red Velvet Cake your own with these fun twists!
-
Gluten-Free: Substitute all-purpose flour with a gluten-free blend. Just ensure it includes xanthan gum for proper texture.
-
Chocolate Twist: Enhance the chocolate flavor by increasing cocoa powder to 2 tablespoons. This adds a deeper richness to each slice.
-
Nutty Flavor: Add 1 cup of finely chopped walnuts or pecans to the batter for a delightful crunch and a nutty aroma.
-
Fruit Infusion: Incorporate 1 cup of pureed raspberries or strawberries into the batter for a fruity twist, elevating the cake’s flavor profile.
-
Citrus Zest: Add the zest of one orange or lemon to the frosting for a bright, refreshing contrast to the rich cream cheese.
-
Vegan Option: Replace the eggs with 1/2 cup of unsweetened applesauce or a flax egg (1 tablespoon ground flaxseed mixed with 2.5 tablespoons water).
-
Spicy Kick: Add 1/2 teaspoon of cinnamon or a pinch of cayenne pepper to the dry ingredients for a warm, subtle spice that tantalizes the taste buds.
-
Layered Delight: Create a layered cake with alternating flavors by making half the batter red velvet and the other half chocolate, then layer them together for a stunning look.
Each variation opens new avenues of flavor and texture, making this iconic cake delightfully yours! Enjoy experimenting!
What to Serve with Red Velvet Cake?
Create the perfect celebration around this striking dessert with delightful sides and beverages.
-
Vanilla Ice Cream: Adds a creamy contrast that balances the rich flavors, providing a delightful temperature variation with each bite.
-
Fresh Berries: Strawberries or raspberries served on the side add a burst of freshness and a pop of color that complements the cake’s vibrant hue.
-
Chocolate-Covered Strawberries: For a luxurious treat, these sweet delights introduce an extra layer of indulgence that pairs beautifully with the cake.
-
Buttery Pecan Pie: A slice of this classic dessert brings a nutty crunch, adding richness that complements the smoothness of the cream cheese frosting.
-
Mint Tea: A soothing, fragrant beverage that refreshes the palate between bites, balancing the sweetness of the cake.
-
Espresso: The robust flavors of coffee enhance the cake’s subtle cocoa taste; a perfect pair for an afternoon treat or after dinner indulgence.
-
Whipped Cream: Light and airy, a dollop of whipped cream adds a delightful creaminess, making each slice of cake even more irresistible.
-
Sparkling Lemonade: This sparkling drink offers a delightful tartness that contrasts with the sweetness, invigorating your taste buds and elevating the experience.
-
Chocolate Ganache: Drizzling warm ganache over each slice not only adds decadence but also complements the cake’s flavors with its rich chocolatey touch.
These pairings create a memorable dining experience that highlights the extraordinary charm of your homemade Red Velvet Cake!
Make Ahead Options
These Red Velvet Cake layers are perfect for meal prep enthusiasts! You can prepare the cake itself up to 3 days in advance by baking and allowing the layers to cool completely. Once cooled, wrap each layer tightly in plastic wrap and store them in the refrigerator to keep them moist. The cream cheese frosting can be made ahead as well; it will stay fresh in the fridge for up to 5 days in an airtight container. When you’re ready to serve, simply frost and assemble the cake. This way, your Red Velvet Cake will taste just as delicious as if it were freshly made, saving you time for any special occasion or gathering!
How to Store and Freeze Red Velvet Cake
Room Temperature: Enjoy your Red Velvet Cake at room temperature for up to 3 days. Store it in an airtight container to maintain freshness and moisture.
Fridge: If you have leftover cake, refrigerate it for up to 5 days. Wrap slices tightly in plastic wrap or place them in an airtight container to prevent drying out.
Freezer: To freeze your Red Velvet Cake, wrap individual slices in plastic wrap and then place them in a freezer bag. It will keep well for up to 3 months. Thaw overnight in the fridge when ready to enjoy.
Reheating: If you prefer your cake warm, gently reheat slices in the microwave for 10-15 seconds. This softens the frosting and brings back the cake’s delightful texture.
Chef's Helpful Tips
- When making Red Velvet Cake, ensure all your wet ingredients are at room temperature for better emulsification, which helps in achieving a smooth batter.
- A common mistake is overmixing the batter; mix until just combined to keep the cake light and fluffy.
- To achieve that iconic red color, use gel food coloring instead of liquid, as it provides more vibrant results without altering the batter’s consistency.
- Bake the cake until a toothpick inserted in the center comes out clean, which usually takes about 30 to 35 minutes but keep an eye on it to avoid overbaking.
Red Velvet Cake Recipe FAQs
How can I choose ripe ingredients for my Red Velvet Cake?
Absolutely! When selecting your ingredients, make sure your eggs are fresh and at room temperature for easier mixing. The buttermilk should also be fresh; its tangy flavor enhances the cake. For the best cocoa powder, choose unsweetened and double-check the baking soda’s expiration date for maximum leavening power.
How should I store leftover Red Velvet Cake?
When it comes to storage, your delicious Red Velvet Cake can be kept at room temperature in an airtight container for up to 3 days. If you have leftover slices, wrap them tightly in plastic wrap or store them in an airtight container in the fridge, where they can last for up to 5 days. Just make sure they’re well-covered to prevent them from drying out!
Can I freeze my Red Velvet Cake?
Certainly! To freeze your Red Velvet Cake, start by wrapping individual slices in plastic wrap. Then, place them in a freezer bag or airtight container. The cake will hold up well in the freezer for up to 3 months. When you’re ready to enjoy a slice, simply thaw it overnight in the refrigerator, and it will be as delightful as the day you baked it!
What should I do if my Red Velvet Cake is too dry?
Very! If your cake turns out dry, a few factors may be at play. Ensure you’re measuring your flour correctly (use the spoon-and-level method) and avoid overbaking. If you find yourself with a dry cake, try serving it with a scoop of vanilla ice cream or whipped cream to add moisture and enhance the flavors! If you find it too dry even after serving, consider making a syrup to soak the layers gently.
Is there a gluten-free option for this Red Velvet Cake?
Indeed! If you need to make a gluten-free version of the Red Velvet Cake, you can use a 1:1 gluten-free all-purpose flour blend that includes xanthan gum. This will help maintain the texture similar to traditional flour. Just make sure to follow the same measurements as the all-purpose flour listed in this recipe for similar results!
Red Velvet Cake
Ingredients
- 2 cups All-purpose flour Sift to avoid lumps.
- 1.5 cups Granulated sugar Ensure well combined for an even texture.
- 1 teaspoon Baking soda Use fresh for best results.
- 1 teaspoon Salt Balances sweetness.
- 1 tablespoon Cocoa powder Use unsweetened for a deeper taste.
- 1 cup Vegetable oil Can be replaced with melted butter.
- 1 cup Buttermilk Yogurt mixed with milk can be substituted.
- 2 large Large eggs Use room temperature.
- 2 tablespoons Red food coloring Gel coloring is preferred.
- 1 teaspoon Vanilla extract Use pure for best flavor.
- 1 tablespoon White vinegar Don’t skip for extra lift.
- 8 ounces Cream cheese Let it soften for easier mixing.
- 1/2 cup Unsalted butter Softening helps achieve ideal consistency.
- 4 cups Powdered sugar Sift to ensure a smooth blend.
- 1 teaspoon Vanilla extract Optional: add almond extract for twist.
- 2 tablespoons Milk Add gradually to prevent over-thinning.
Method
- Preheat your oven to 350°F (175°C). Grease and flour the pans.
- Sift together the flour, sugar, baking soda, salt, and cocoa powder.
- Whisk the vegetable oil, buttermilk, eggs, red food coloring, vanilla extract, and vinegar together.
- Combine the wet and dry ingredients, stirring gently until just incorporated.
- Pour the batter evenly into the prepared cake pans.
- Bake for 30–35 minutes or until a toothpick inserted in the center comes out clean.
- Cool the cakes in the pans for about 10 minutes before transferring them to a wire rack.
- Beat the softened cream cheese and butter together until smooth and creamy.
- Add the powdered sugar gradually, mixing until fluffy, then add the vanilla extract.
- Adjust the frosting consistency with milk if necessary.
- Level the tops of the cooled cakes with a knife if needed.
- Assemble the cake by placing one layer on a plate, frosting it, and topping with the second layer.
- Decorate with additional frosting, sprinkles, or fresh berries if desired.
- Slice the cake and serve at room temperature.


Leave a Comment