There’s something utterly delightful about creating a dessert that both looks stunning and tastes even better. Enter the Matcha Mousse Dome Recipe—my secret weapon for impressing guests or simply indulging myself on a quiet evening at home. As I was experimenting in my kitchen, I discovered the perfect balance between the rich flavors of dark chocolate and the delicate, earthy notes of matcha.
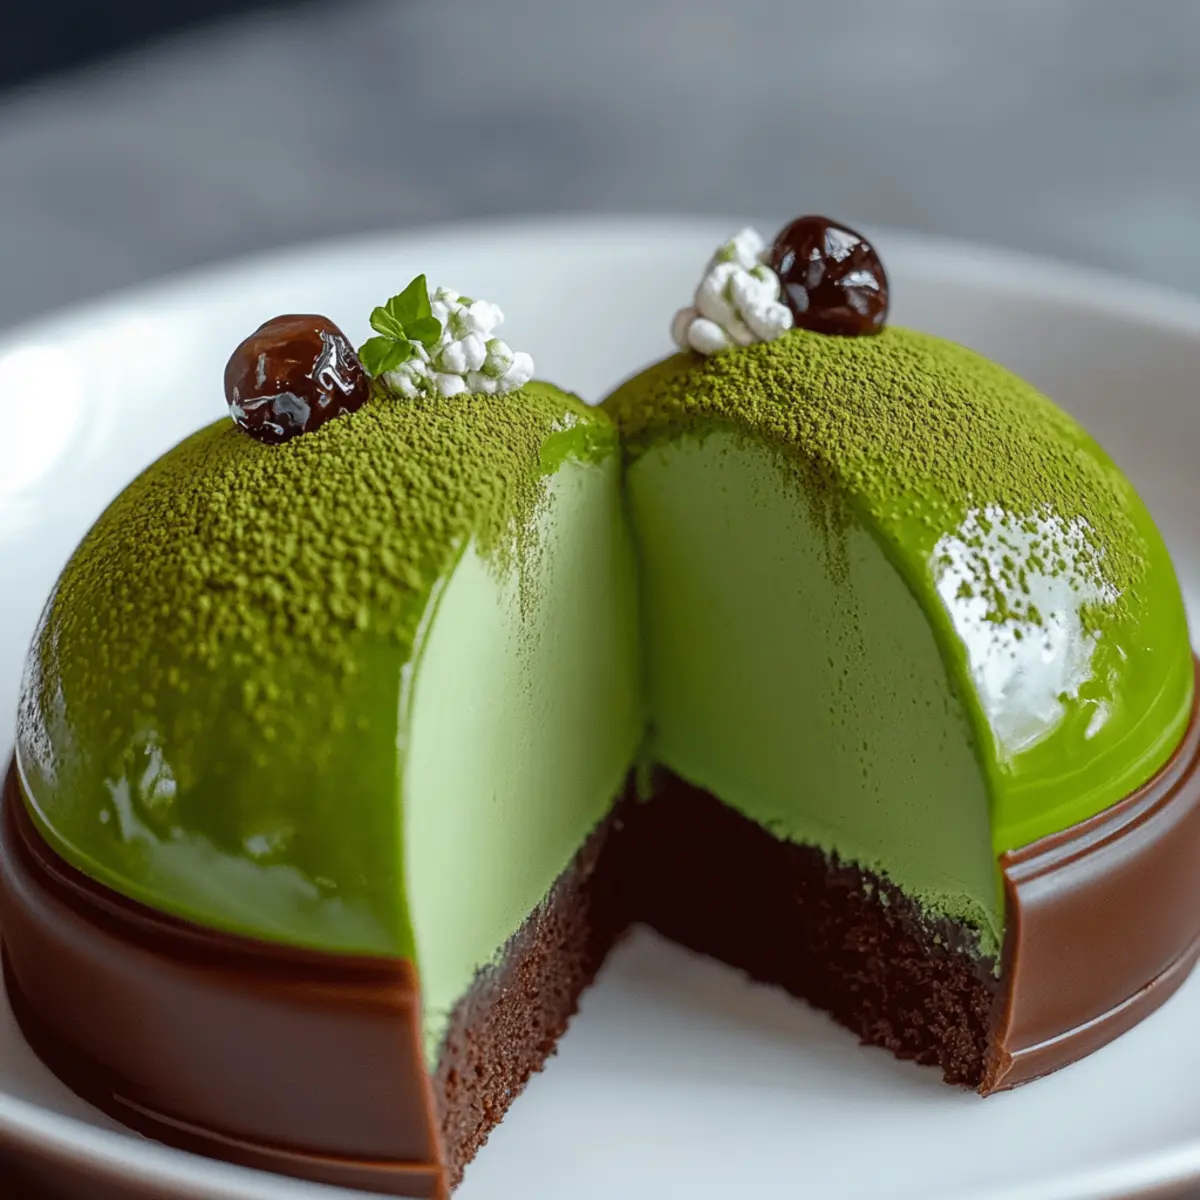
This dessert not only satisfies a sweet tooth but also brings that impressive “wow” factor to any occasion, making it a favorite among friends and family alike. And the best part? With just a little bit of patience and the right ingredients, you can create these elegant domes without needing to be a professional pastry chef.
Let’s dive into this easy, yet elegant recipe that transforms simple ingredients into a decadent masterpiece that will make your taste buds dance!
Why You'll Love This Matcha Mousse Dome Recipe
- This delightful dessert is incredibly easy to make, allowing you to impress your guests without spending hours in the kitchen.
- The unique combination of rich dark chocolate and vibrant matcha delivers a heavenly flavor that is both indulgent and refreshing.
- This recipe is versatile enough to be dressed up for special occasions or enjoyed casually at home, making it a perfect fit for any event.
- Its stunning visual appeal will leave your friends in awe, making it a true centerpiece that elevates any dessert table.
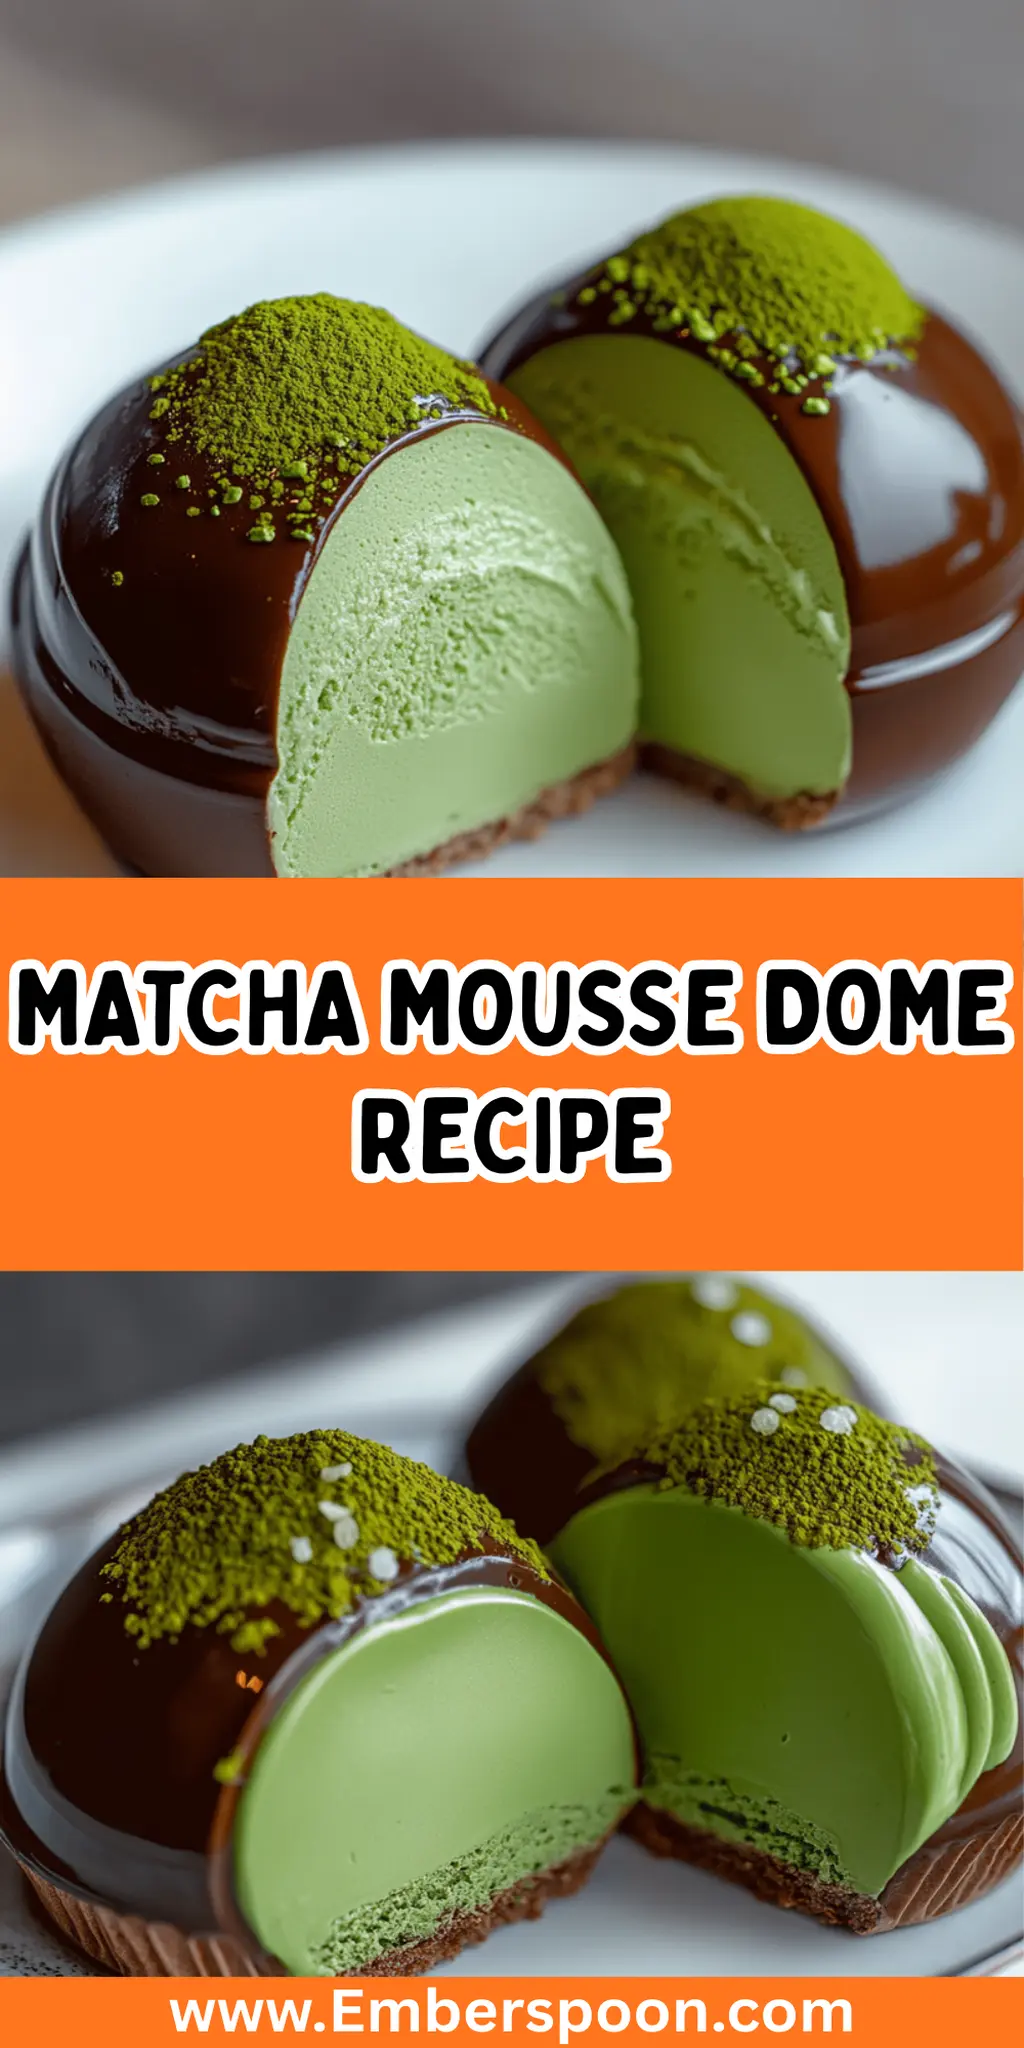
Matcha Mousse Dome Ingredients
Here’s everything you need to create these stunning Matcha Mousse Domes!
For the Mousse
- Heavy cream – ideal for a rich, fluffy texture that makes the mousse perfectly light.
- Granulated sugar – sweetens the mousse while enhancing the matcha flavor beautifully.
- Matcha powder – choose high-quality for a vibrant color and authentic taste; save some for dusting!
- Gelatin powder – provides the structure needed for a perfect mousse; don’t skip this!
- Water – helps bloom the gelatin, ensuring it dissolves evenly.
- Vanilla extract – adds a subtle depth of flavor to balance the matcha.
For the Chocolate Coating
- Dark chocolate – provides a rich, indulgent shell that complements the matcha mousse perfectly.
- Coconut oil (optional) – adds shine and mellows the chocolate flavor; use for an extra touch of smoothness.
With these delicious ingredients, you’re just a few steps away from creating a delightful Matcha Mousse Dome that will wow your guests!
How to Make Matcha Mousse Dome
-
Melt the Chocolate: In a microwave-safe bowl, combine the chopped dark chocolate and coconut oil (if using). Microwave in 30-second intervals, stirring between until the mixture is fully melted and smooth, creating a silky chocolate base.
-
Coat the Molds: Using a silicone dome mold, carefully coat the inside of each dome with a layer of the melted chocolate. Ensure it’s thick enough to hold its shape, then place the mold in the freezer for about 15 minutes until set.
-
Bloom the Gelatin: In a small bowl, sprinkle the gelatin over the water and let it sit for about 5 minutes to bloom, becoming soft and sponge-like for the mousse.
-
Dissolve the Gelatin: Gently heat the bloomed gelatin in the microwave for about 10 seconds until it dissolves. Let it cool slightly before adding to the mousse mixture.
-
Whip the Cream: In a mixing bowl, whip together the heavy cream and granulated sugar until soft peaks form. Be careful not to overwhip, as you want a light and airy texture.
-
Mix the Matcha: In another bowl, mix the matcha powder with a few tablespoons of the whipped cream to create a smooth paste. Gently fold in the remaining whipped cream until fully combined, resulting in a lovely green hue.
-
Combine Ingredients: Stir in the dissolved gelatin and vanilla extract, folding gently to incorporate everything without deflating the fluffy mousse.
-
Fill the Molds: Remove the chocolate-coated molds from the freezer. Spoon or pipe the matcha mousse into each dome, filling them to the top for a beautiful finish.
-
Set the Mousse: Smooth the tops of the filled molds with a spatula, then return them to the freezer for at least 2 hours or until the mousse is fully set and firm to the touch.
-
Release the Domes: Once set, gently remove the mousse domes from the silicone molds. If needed, warm the mold slightly with your hands to help release the mousse easily.
-
Dust with Matcha: Optionally, dust the tops of the domes with additional matcha powder for a touch of elegance, enhancing their visual appeal.
-
Serve Delightfully: Place the domes on individual plates and serve immediately, delighting your guests with this stunning treat!
Optional: For an extra touch, drizzle with melted chocolate before serving.
Exact quantities are listed in the recipe card below.
Matcha Mousse Dome Variations
Embrace your creativity and make this delightful dessert your own with these fun twists and substitutions!
-
Dairy-Free: Use coconut cream instead of heavy cream for a luscious, non-dairy option. The coconut adds a tropical flair that complements the matcha beautifully!
-
Vegan: Substitute the gelatin with agar-agar and use dark chocolate that’s dairy-free. These swaps keep the gorgeous texture while catering to a plant-based diet.
-
Flavor Infusion: Add a splash of almond extract for a nutty twist. This subtle flavor enhances the overall profile and gives your mousse an unexpected depth!
-
White Chocolate Coating: Swap dark chocolate for white chocolate to create a sweeter taste. The contrast of the vibrant matcha against the white adds a visually stunning appeal.
-
Crunchy Texture: Fold in some crushed almonds or pistachios into the mousse for added crunch. It’s a whimsical surprise in every bite that can elevate the overall experience!
-
Heat Factor: Stir in a pinch of matcha-infused chili powder for a surprising spicy kick. This will give your dessert an intriguing dimension that adventurous eaters will love!
-
Nutty Variations: Incorporate hazelnut or cashew butter in the mousse to introduce a creamy, nutty layer. It adds richness and pairs deliciously with the earthy matcha flavor.
-
Fruit Flavor Twist: Add a layer of fruit puree, like raspberry or passionfruit, under the mousse for a vibrant surprise. The acidity from the fruit cuts through the richness, making each mouthful more refreshing!
Make Ahead Options
These Matcha Mousse Domes are perfect for busy home cooks looking to save time without sacrificing flavor! You can prepare the mousse filling up to 24 hours in advance by whipping the cream, mixing in the matcha, and folding in the gelatin, then storing it in an airtight container in the refrigerator. The chocolate-coated molds can also be made ahead and kept in the freezer for up to 3 days. Just remember to fill the molds and let them set in the freezer for at least 2 hours before serving. By prepping these components in advance, you’ll ensure that your dessert is just as delightful when it’s time to impress your guests!
How to Store and Freeze Matcha Mousse Dome
Fridge: Store leftover Matcha Mousse Domes in an airtight container in the refrigerator for up to 3 days. This keeps them fresh and ready for delightful snacking!
Freezer: For longer storage, freeze the mousse domes in a single layer for up to 2 months. Wrap each dome tightly in plastic wrap and place them in a freezer-safe container.
Thawing: To enjoy, simply remove the desired number of domes from the freezer and thaw them in the refrigerator for several hours. Avoid microwaving, as it can alter the texture.
Reheating: If you wish to serve them slightly warmed, let them sit at room temperature for 10-15 minutes before enjoying!
What to Serve with Matcha Mousse Dome?
Elevate your dessert experience with perfect pairings that sing alongside this delightful mousse creation.
-
Fresh Berries: Juicy strawberries or raspberries add a bright, tart contrast that enhances the earthy matcha flavors beautifully.
-
Vanilla Ice Cream: A scoop of creamy vanilla ice cream provides a rich accompaniment, balancing the mousse’s delicate texture and flavor.
-
Ginger Snap Cookies: The spicy crunch of ginger snaps offers a delightful textural contrast, creating an exciting flavor combination.
-
Mint Tea: A refreshing cup of mint tea complements the dessert seamlessly, infusing a fragrant finish to the sweet experience.
-
Chocolate Sauce: A drizzle of warm chocolate sauce amplifies the richness of the dark chocolate coating, providing an irresistible indulgence.
-
Coconut Whipped Cream: Light and airy, this dairy-free option enhances the tropical notes from coconut oil while keeping the dish wonderfully light.
-
Matcha Latte: For a harmonious experience, pair with a creamy matcha latte, echoing the dessert’s flavor while adding a cozy beverage option.
-
Sesame Brittle: The crunch of homemade sesame brittle brings a unique, nutty flavor that contrasts brilliantly with the soft mousse.
These delicious options not only beautify your serving table but also create a memorable dessert experience that leaves everyone wanting more!
Chef's Helpful Tips
- When making the Matcha Mousse Dome, ensure your heavy cream is well-chilled before whipping for the best volume.
- A common mistake is overwhipping the cream, so stop once you achieve soft peaks for a light texture.
- When coating the silicone molds, make sure the layer of chocolate is thick enough to provide a sturdy shell; if in doubt, add a second layer after the first has set.
- For the best results, allow the mousse to set in the freezer for at least 2 hours to achieve a perfect consistency before serving.
Matcha Mousse Dome Recipe FAQs
What type of matcha powder should I use?
Absolutely! For the best flavor and vibrant color, choose high-quality ceremonial grade matcha powder. This will ensure that your Matcha Mousse Dome not only looks stunning but also delivers an authentic and delightful taste that complements the richness of the chocolate.
How long can I store the Matcha Mousse Domes?
The longer the merrier! You can store leftover Matcha Mousse Domes in an airtight container in the refrigerator for up to 3 days. Just be sure to keep them covered so they maintain their delicious flavor and smooth texture.
What are the best methods for freezing Matcha Mousse Domes?
To freeze your delightful domes, wrap each one tightly in plastic wrap to prevent freezer burn, then place them in a freezer-safe container. They’ll last for up to 2 months this way. When you’re ready to enjoy one, move it to the refrigerator and let it thaw for several hours. I recommend avoiding microwaving, as it can change that luscious texture we all love!
Can I use a different type of chocolate for the coating?
Very much so! While dark chocolate adds a delightful richness, feel free to experiment with milk or white chocolate if you prefer a sweeter or creamier taste. Just remember to adjust the amount of sugar in your mousse if your chosen chocolate is sweeter than dark.
What should I do if my mousse is too runny?
If you find your mousse is too runny, it may be due to not whipping the cream enough or not allowing the gelatin to fully bloom. To salvage it, try placing it back in the refrigerator and allowing it to set a bit longer. If it remains too runny after that, you can whip up an additional batch of whipped cream and fold it in gently to achieve a thicker consistency.
Are there any dietary considerations for the Matcha Mousse Dome?
Absolutely! If you’re making this dessert for someone with dietary restrictions, consider using dairy-free whipped cream and a gelatin alternative such as agar-agar for a vegan option. Always check the ingredients of your chocolate as well, as some brands may contain dairy or other allergens. This way, everyone can enjoy your delightful creation!
Matcha Mousse Dome Recipe
Ingredients
- 1 cup Heavy cream well-chilled
- 1/2 cup Granulated sugar
- 2 tablespoons Matcha powder high-quality
- 1 tablespoon Gelatin powder
- 2 tablespoons Water
- 1 teaspoon Vanilla extract
- 6 ounces Dark chocolate
- 1 tablespoon Coconut oil optional
Method
- Melt the Chocolate: In a microwave-safe bowl, combine the chopped dark chocolate and coconut oil (if using). Microwave in 30-second intervals, stirring between until the mixture is fully melted and smooth, creating a silky chocolate base.
- Coat the Molds: Using a silicone dome mold, carefully coat the inside of each dome with a layer of the melted chocolate. Ensure it's thick enough to hold its shape, then place the mold in the freezer for about 15 minutes until set.
- Bloom the Gelatin: In a small bowl, sprinkle the gelatin over the water and let it sit for about 5 minutes to bloom, becoming soft and sponge-like for the mousse.
- Dissolve the Gelatin: Gently heat the bloomed gelatin in the microwave for about 10 seconds until it dissolves. Let it cool slightly before adding to the mousse mixture.
- Whip the Cream: In a mixing bowl, whip together the heavy cream and granulated sugar until soft peaks form. Be careful not to overwhip, as you want a light and airy texture.
- Mix the Matcha: In another bowl, mix the matcha powder with a few tablespoons of the whipped cream to create a smooth paste. Gently fold in the remaining whipped cream until fully combined, resulting in a lovely green hue.
- Combine Ingredients: Stir in the dissolved gelatin and vanilla extract, folding gently to incorporate everything without deflating the fluffy mousse.
- Fill the Molds: Remove the chocolate-coated molds from the freezer. Spoon or pipe the matcha mousse into each dome, filling them to the top for a beautiful finish.
- Set the Mousse: Smooth the tops of the filled molds with a spatula, then return them to the freezer for at least 2 hours or until the mousse is fully set and firm to the touch.
- Release the Domes: Once set, gently remove the mousse domes from the silicone molds. If needed, warm the mold slightly with your hands to help release the mousse easily.
- Dust with Matcha: Optionally, dust the tops of the domes with additional matcha powder for a touch of elegance, enhancing their visual appeal.
- Serve Delightfully: Place the domes on individual plates and serve immediately, delighting your guests with this stunning treat!

Leave a Comment