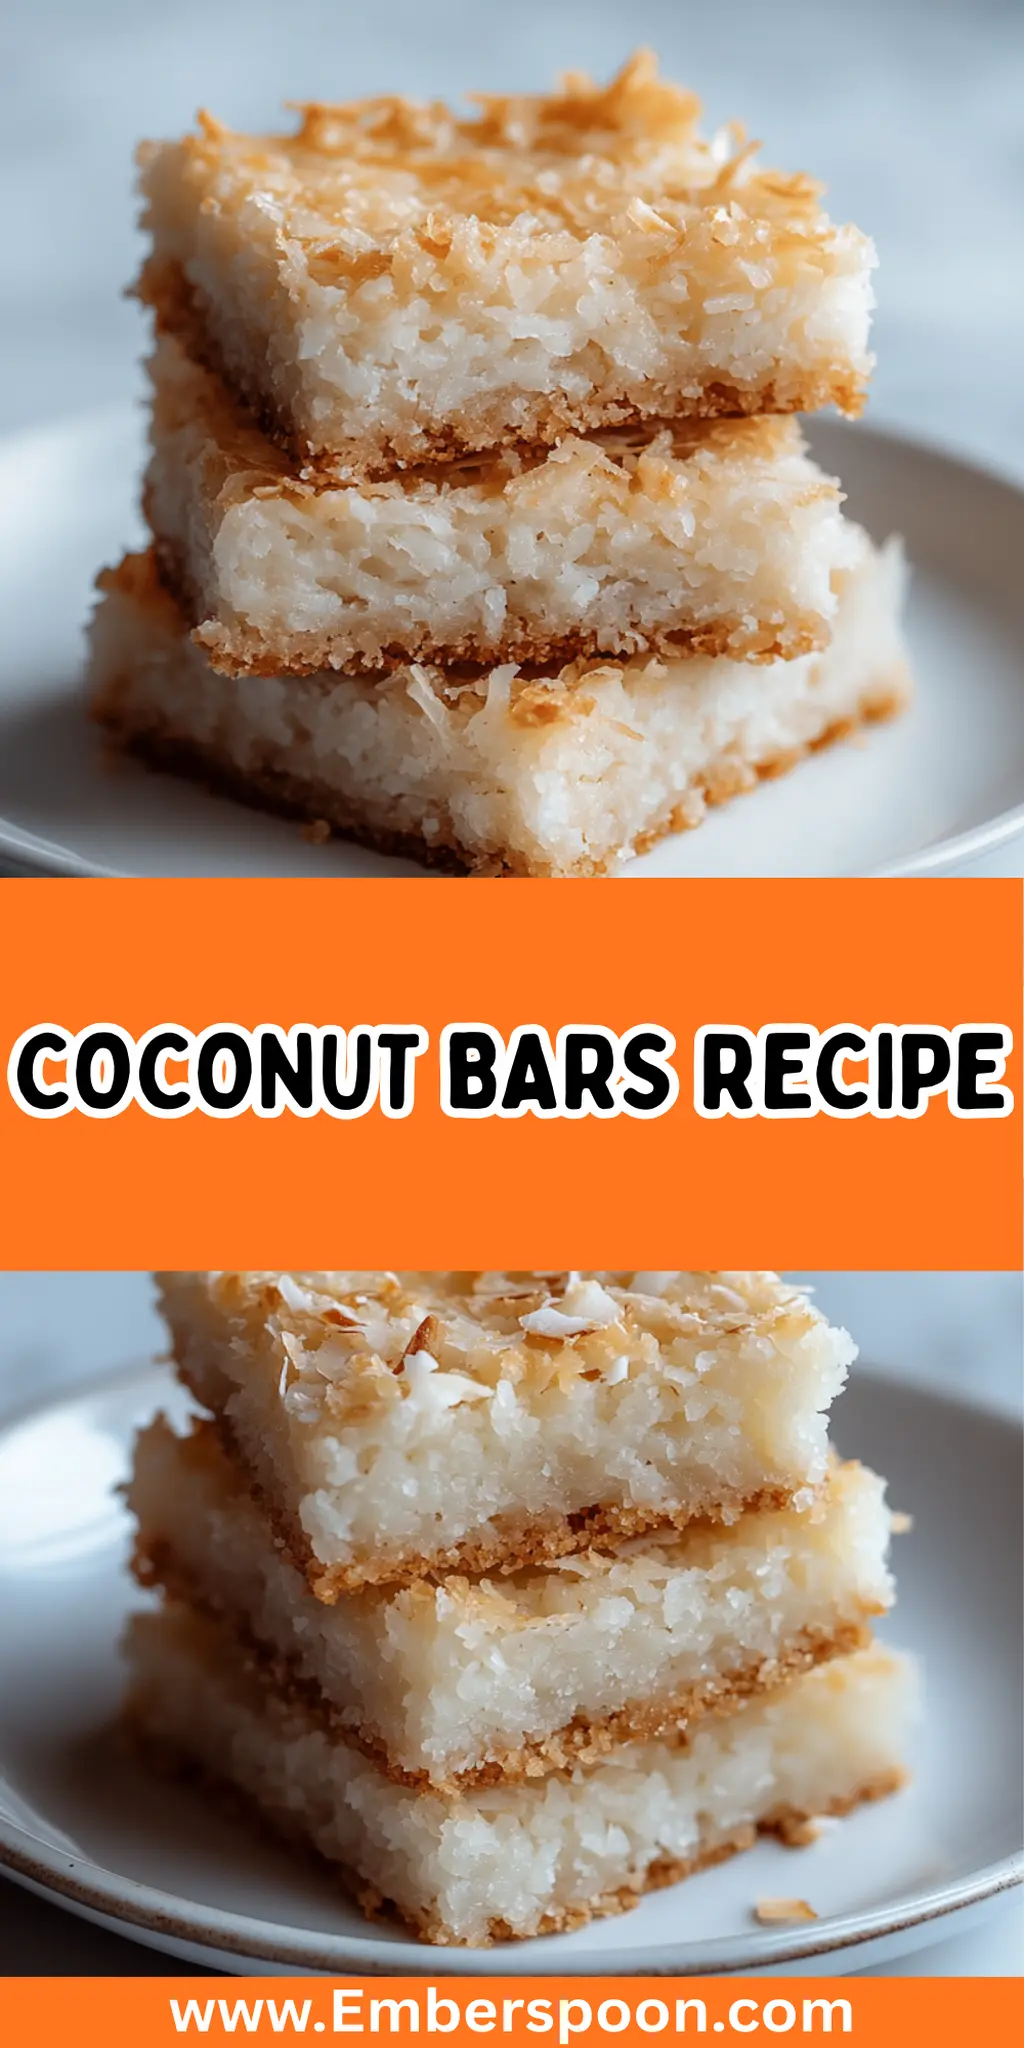
There’s something incredibly rewarding about creating a delicious treat from simple ingredients, and this Coconut Bars Recipe is one of my favorites. Picture yourself in the kitchen, the sweet scent of maple syrup mingling with the nutty aroma of almond flour as you whip up a delightful snack that’s both satisfying and wholesome.
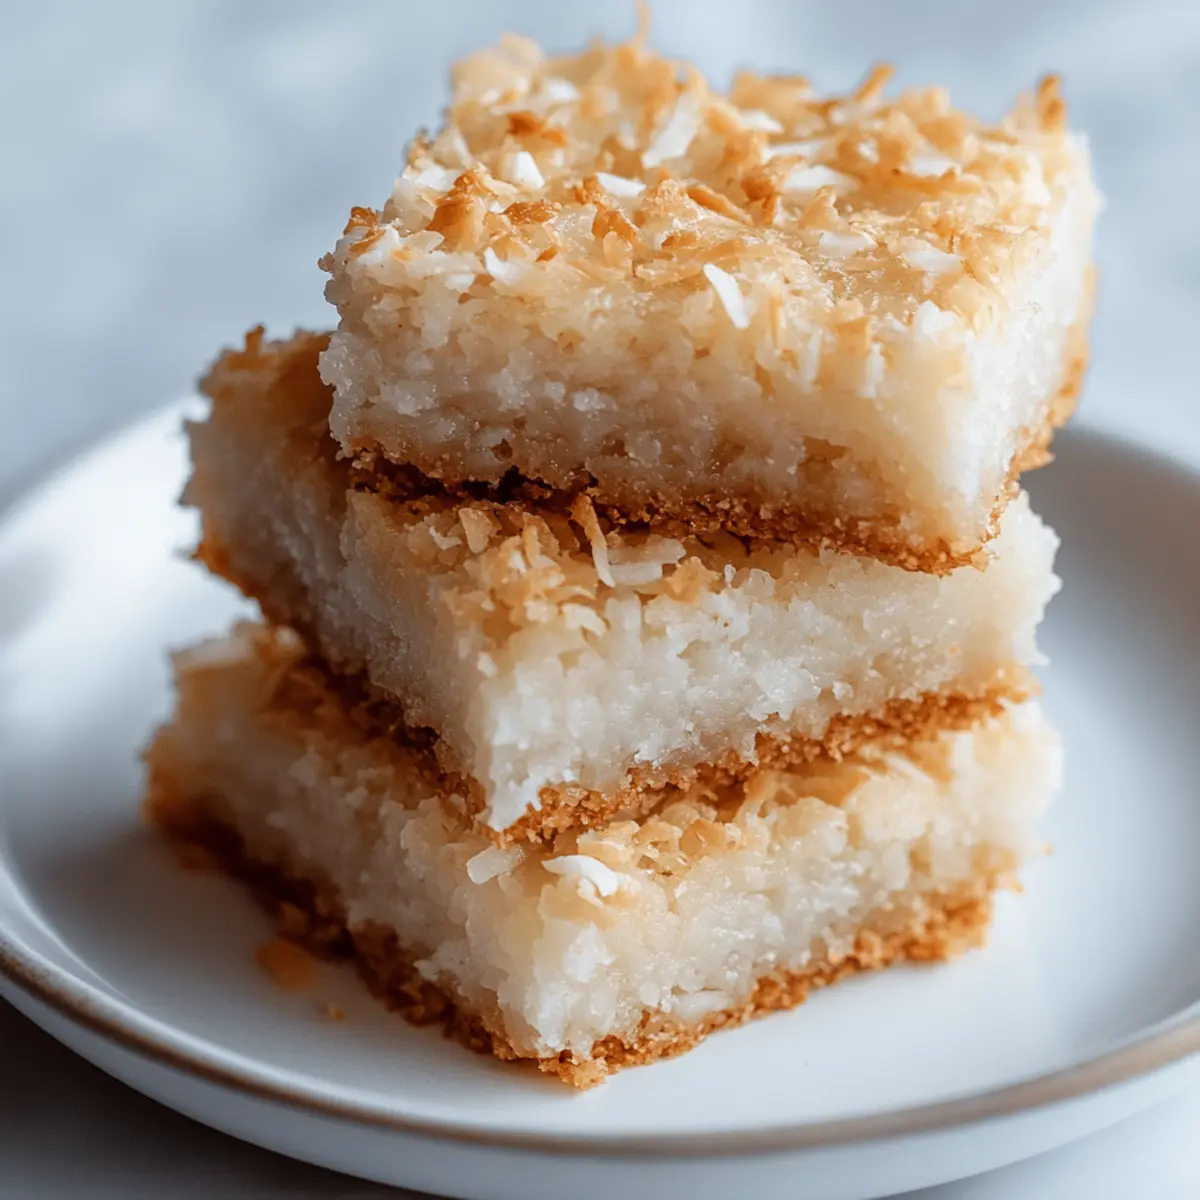
When I first experimented with this recipe, I unexpectedly found that the combination of unsweetened shredded coconut and almond flour makes for a wonderfully chewy texture—perfect for those busy afternoons when you crave a little pick-me-up. Plus, with just a few minutes of prep time, they come together effortlessly, making them a fantastic option for anyone looking to escape the monotony of fast food.
These bars are not just heavenly to the tastebuds; they’re also a hit at gatherings, ensuring there’s something everyone can enjoy without the guilt. So let’s dive into this quick and easy recipe that promises a burst of flavor in every bite!
Why You'll Love This Coconut Bars Recipe
- This Coconut Bars Recipe is incredibly easy to make, requiring only a few simple ingredients and just 10 minutes of prep time.
- The blend of unsweetened shredded coconut and almond flour creates a chewy texture that is both satisfying and delicious.
- These bars are versatile enough to be enjoyed as a snack, dessert, or even a healthy breakfast on the go.
- With their delightful flavors and appealing appearance, they are sure to be a crowd-pleaser at any gathering.
Coconut Bars Recipe Ingredients
For the Base
- Unsweetened shredded coconut – adds a delicious chewiness and tropical flavor to your Coconut Bars.
- Almond flour – provides a nutty taste and is a great gluten-free alternative to traditional flour.
- Maple syrup – sweetens the bars naturally, adding a rich maple flavor that complements the coconut perfectly.
Feel free to experiment with these ingredients as you prepare your Coconut Bars Recipe!
How to Make Coconut Bars
-
Combine Ingredients: In a mixing bowl, combine the shredded coconut, almond flour, and maple syrup. Mix well until the mixture is sticky and all ingredients are fully incorporated.
-
Prepare the Dish: Line an 8×8-inch baking dish with parchment paper. Leave some overhang for easy removal once your bars set.
-
Press Mixture: Transfer the coconut mixture to the prepared baking dish. Press it down firmly and evenly to create a compact layer that holds together well.
-
Chill to Set: Place the baking dish in the refrigerator for about 30 minutes. This time helps the bars firm up and makes cutting easier.
-
Cut and Serve: Once set, remove the bars from the dish using the parchment paper. Cut into bars or squares as desired for a beautiful presentation.
Optional: Drizzle with melted dark chocolate for an extra touch of indulgence.
Exact quantities are listed in the recipe card below.
What to Serve with Coconut Bars?
Indulging in Coconut Bars opens the door to a wonderful world of meal pairings that will turn a simple snack into a spectacular spread.
-
Tropical Fruit Salad: Fresh mango, pineapple, and kiwi add a burst of juicy sweetness, making every bite feel like a mini-vacation.
-
Creamy Yogurt: Serve alongside a dollop of Greek yogurt to create a delightful contrast of textures, enhancing the coconut’s chewiness.
-
Nutty Granola: A sprinkle of granola on the side provides a hearty crunch, perfectly complementing the softness of the bars.
-
Dark Chocolate Drizzle: Elevate your bars by drizzling melted dark chocolate over the top, adding a decadent touch that bridges flavors beautifully.
-
Vanilla Ice Cream: Pair these bars with a scoop of vanilla ice cream for a tropical spin on the classic sundae. The creaminess balances beautifully against the chewy bars.
-
Chai Latte: Enjoy with a warm chai latte, where the spices complement the tropical coconut, wrapping you in a cozy hug.
-
** Fresh Mint Tea:** A refreshing cup of mint tea cleanses the palate and adds a light touch, allowing the coconut’s flavors to shine.
-
Lemon Sorbet: This tart and refreshing dessert contrasts the sweetness of the coconut bars, providing a delightful sensory experience.
-
Sparkling Water: Enhance your snack with bubbly water infused with a slice of lime or lemon for a refreshing twist that’s oh-so-refreshing!
How to Store and Freeze Coconut Bars
Room Temperature: Keep your Coconut Bars at room temperature in an airtight container for up to 3 days. This is ideal for a satisfying snack anytime.
Fridge: For longer freshness, store the bars in the refrigerator in a sealed container. They’ll stay delicious for up to a week, perfect for snacking throughout the week.
Freezer: To enjoy your Coconut Bars later, wrap them tightly in plastic wrap and then place them in a freezer-safe container. They can last up to 3 months.
Reheating: For a delightful warm treat, pop your Coconut Bars in the microwave for 10-15 seconds, just until slightly softened. Enjoy the cozy flavors!
Make Ahead Options
These Coconut Bars Recipe are perfect for meal prep enthusiasts looking to save time without sacrificing flavor! You can prepare the coconut mixture and press it into the baking dish up to 24 hours in advance. Simply cover the dish tightly with plastic wrap and refrigerate to maintain their freshness. When you’re ready to enjoy your bars, just remove them from the fridge, allow them to sit at room temperature for a few minutes, and then slice them into squares. This way, you’ll have a delicious, naturally sweet treat on hand for quick snacks or dessert, all while keeping the texture just as delightful!
Coconut Bars Recipe Variations
Feel free to unleash your creativity and tweak these bars to suit your taste or dietary needs!
-
Nut-Free: Replace almond flour with oat flour to make it suitable for nut allergies while keeping it gluten-free.
-
Sweetener Swap: Agave syrup is a great alternative to maple syrup for a similar sweetness that’s vegan-friendly.
-
Chewy & Crunchy: Mix in some chopped pecans or walnuts for a delightful texture contrast that adds extra heartiness to each bite.
-
Chocolate Delight: Add dark chocolate chips for a rich, indulgent twist that will satisfy your chocolate cravings beautifully!
-
Tropical Flare: Toss in some dried pineapple or mango pieces for a burst of fruity flavor that transports you to an island paradise.
-
Spice it Up: Sprinkle in a pinch of cinnamon or nutmeg to warm up the flavor profile, making it even more comforting and delightful.
-
Coconut Cream: Use coconut cream instead of maple syrup for a richer flavor that amplifies the coconut goodness in each bar.
-
Protein Boost: Stir in a scoop of your favorite protein powder to make a nutritious snack that powers you through your day.
Embrace the journey of flavor exploration and let these variations inspire countless tasty adventures!
Chef's Helpful Tips
- When making Coconut Bars, ensure you mix the ingredients until they are well combined and sticky to achieve the perfect texture.
- Avoid using sweetened shredded coconut, as it can make the bars overly sweet and affect the desired flavor.
- Press the mixture down firmly in the baking dish to ensure the bars hold together when cut, as a loose mixture may crumble.
- Allow the bars to chill in the refrigerator for at least 30 minutes, as this is crucial for them to set properly before cutting.
Coconut Bars Recipe FAQs
What type of shredded coconut should I use?
I recommend using unsweetened shredded coconut for this recipe. Unsweetened coconut helps maintain the bars’ natural flavors without adding unnecessary sweetness, allowing the maple syrup to shine through. Look for a finely shredded variety for the best texture and consistent binding.
How should I store leftover coconut bars?
Absolutely! Store your coconut bars in an airtight container at room temperature for up to 3 days. For longer freshness, move them to the fridge; they will stay delicious for up to 1 week. Just make sure to keep them sealed to prevent them from drying out.
Can I freeze these coconut bars? How do I do it?
Yes, you can freeze your coconut bars! First, place them in a single layer on a baking sheet and freeze until solid (about 1-2 hours). Once frozen, transfer the bars to a freezer-safe bag or container, separating layers with parchment paper to avoid sticking. These bars will be good for up to 3 months in the freezer. To enjoy them later, simply thaw them in the fridge for a few hours.
What should I do if my coconut bars are too crumbly?
If your coconut bars turn out crumbly, it’s usually due to not enough moisture or not pressing the mixture down firmly enough. To remedy this, you can try adding a tiny bit more maple syrup (start with 1 tablespoon) to moisten the mixture. Also, ensure when you press the mixture into the pan, it’s compact and even. A firm layer is key to achieving those satisfying bars!
Can I add ingredients for dietary preferences?
Definitely! Feel free to customize these coconut bars to suit your dietary needs. For a nut-free version, replace almond flour with oat flour or coconut flour. If you or someone in your household has a nut allergy, just ensure any add-ins like chopped nuts are safe. You can also make them vegan by ensuring your maple syrup is 100% pure and free from additives.
How can I know when the bars are set properly?
You’ll know your coconut bars are set properly when they feel firm to the touch after chilling for about 30 minutes in the fridge. They should hold their shape and not be overly soft or sticky. If they still feel a bit loose, give them another 10-15 minutes in the fridge; patience is key to perfecting your coconut bars recipe!
Coconut Bars Recipe
Method
- In a mixing bowl, add the unsweetened shredded coconut, almond flour, and maple syrup. Stir well until everything is blended into a sticky, cohesive mixture.
- Line an 8x8-inch baking dish with parchment paper, ensuring you leave some overhang on the sides.
- Transfer your delicious coconut mixture into the lined baking dish. Use your hands or a spatula to press it down firmly and evenly.
- Place the baking dish in the refrigerator and allow the mixture to chill for about 30 minutes.
- Once set, gently lift the coconut slab out of the dish using the parchment paper. Cut into squares or bars.


Leave a Comment