As the sun dipped below the horizon and the evening settled in, my kitchen became a sanctuary of comfort. The sizzle of chicken frying in oil filled the air with anticipation, turning a regular weeknight into a delightful culinary adventure. I had been craving something exciting yet familiar, and that’s when I turned to my absolute favorite: Chicken Katsu Curry Plate.
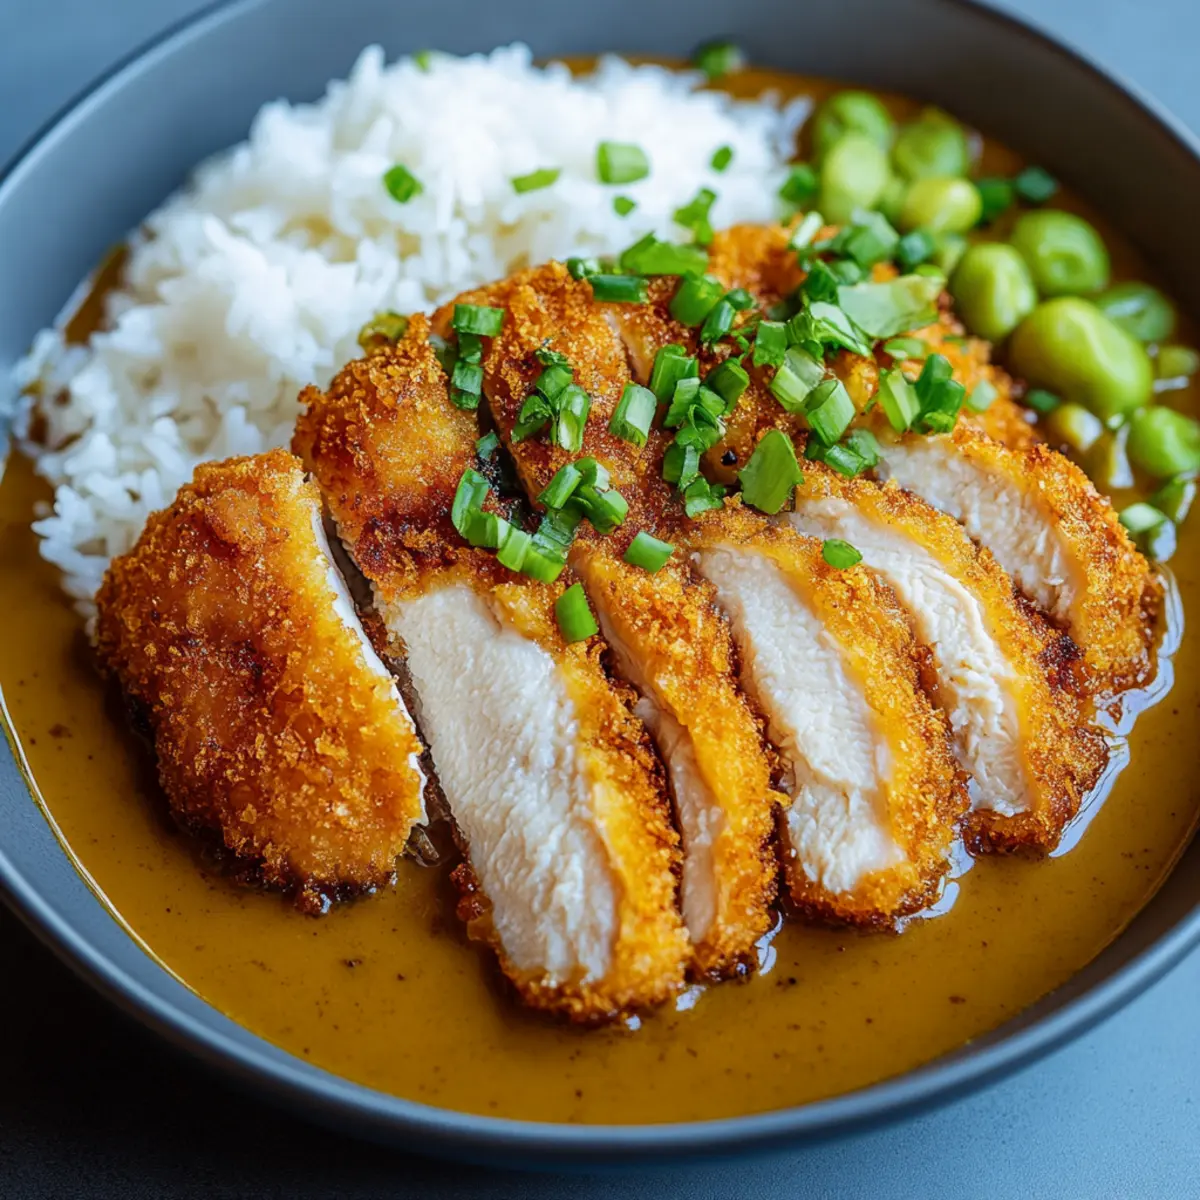
This dish balances crispy, tender chicken with a creamy, aromatic curry that warms the soul. Not only does it satisfy those fast-food cravings with its delicious flavors, but it’s also surprisingly easy to whip up at home. Each bite takes you on a journey through comforting spices and delectable textures, making it a sure-fire hit for family dinners or casual gatherings with friends.
Whether you’re a seasoned chef or just beginning your culinary journey, this Chicken Katsu Curry Plate promises to bring joy to your table. With just a few quality ingredients and a simple method, you’ll create a masterpiece that feels indulgent yet utterly achievable. Let’s dive into this delicious recipe and transform your kitchen into a haven for homemade goodness!
Why You'll Love This Chicken Katsu Curry Plate
- This Chicken Katsu Curry Plate is incredibly easy to make, even for beginner cooks.
- You will be delighted by the delightful combination of crispy chicken and a rich, flavorful curry sauce.
- It’s a versatile dish that can be customized with your favorite vegetables or served over different types of rice.
- The stunning presentation of this meal will impress your family and friends, making it perfect for both casual weeknights and special occasions.
Chicken Katsu Curry Plate Ingredients
• Here’s everything you need for a delightful Chicken Katsu Curry Plate!
For the Chicken Katsu
- Boneless, skinless chicken breasts – a tender and juicy choice that works beautifully when fried.
- All-purpose flour – helps create a crispy coating; you can substitute with gluten-free flour if needed.
- Large eggs – the beaten eggs help the panko stick; consider using egg replacer for a vegan option.
- Panko breadcrumbs – these give an extra crunch; traditional breadcrumbs can be used in a pinch.
- Salt and pepper – essential for seasoning to enhance the flavors.
- Vegetable oil – use for frying; any neutral oil like canola can work too.
For the Curry Sauce
- Vegetable oil – this is used for sautéing the aromatics.
- Onion – finely chopped, adding sweetness and depth to the sauce.
- Garlic – minced, bringing a fragrant touch that complements the curry.
- Ginger – grated, for a warm, spicy kick that’s essential in Asian dishes.
- Carrots – sliced, providing sweetness and a pop of color to your curry.
- Chicken broth – the base of your sauce; vegetable broth can be used for a vegetarian version.
- Curry powder – the star of the dish; adjust the amount based on your spice preference.
- Soy sauce – adds umami depth; tamari can be a gluten-free alternative.
- Honey (optional) – a touch of sweetness to balance the spices; substitute with maple syrup for a vegan option.
- Cooked rice – serve as a hearty base for the dish; jasmine or basmati rice works wonderfully.
- Chopped green onions (optional) – they make for a fresh garnish and add crunch.
With these simple ingredients, you’re just one step away from creating an unforgettable Chicken Katsu Curry Plate that your loved ones will rave about!
How to Make Chicken Katsu Curry Plate
-
Pound the Chicken: Place each chicken breast between two sheets of plastic wrap and gently pound until even, about 1/2 inch thick. This ensures even cooking and tenderness.
-
Season the Chicken: Sprinkle salt and pepper generously on both sides of the chicken breasts. This seasoning is key to enhancing the flavor of the chicken as it fries.
-
Set Up Dredging Station: Prepare three shallow bowls: one with flour, one with beaten eggs, and one with panko breadcrumbs. Dipping in this order ensures a crispy coating.
-
Coat the Chicken: Dredge each chicken breast first in flour, then in the egg, and finally in panko breadcrumbs. Press the breadcrumbs gently to adhere, ensuring a perfect crunch after frying.
-
Heat the Oil: In a large skillet, heat about 1/2 inch of vegetable oil over medium heat until hot. You can test the oil by dropping in a few breadcrumbs; they should sizzle immediately.
-
Fry the Chicken: Carefully add the breaded chicken to the hot oil. Fry for about 4-5 minutes on each side or until golden brown and cooked through. Remove and let drain on paper towels.
-
Sauté Aromatics: In a separate pot, heat 1 tablespoon of vegetable oil over medium heat. Add the chopped onion, garlic, and ginger, sautéing for about 3-4 minutes until softened and fragrant.
-
Add Carrots: Stir in the sliced carrots and cook for another 2-3 minutes. This will add sweetness and flavor to your curry sauce.
-
Make the Curry Sauce: Pour in the chicken broth, curry powder, soy sauce, and honey if using. Bring to a simmer and cook for 10-15 minutes until the carrots are tender, seasoning with salt and pepper to taste.
-
Slice the Chicken: Once the chicken is fried, slice it into strips for easy serving and to soak up the delicious curry.
-
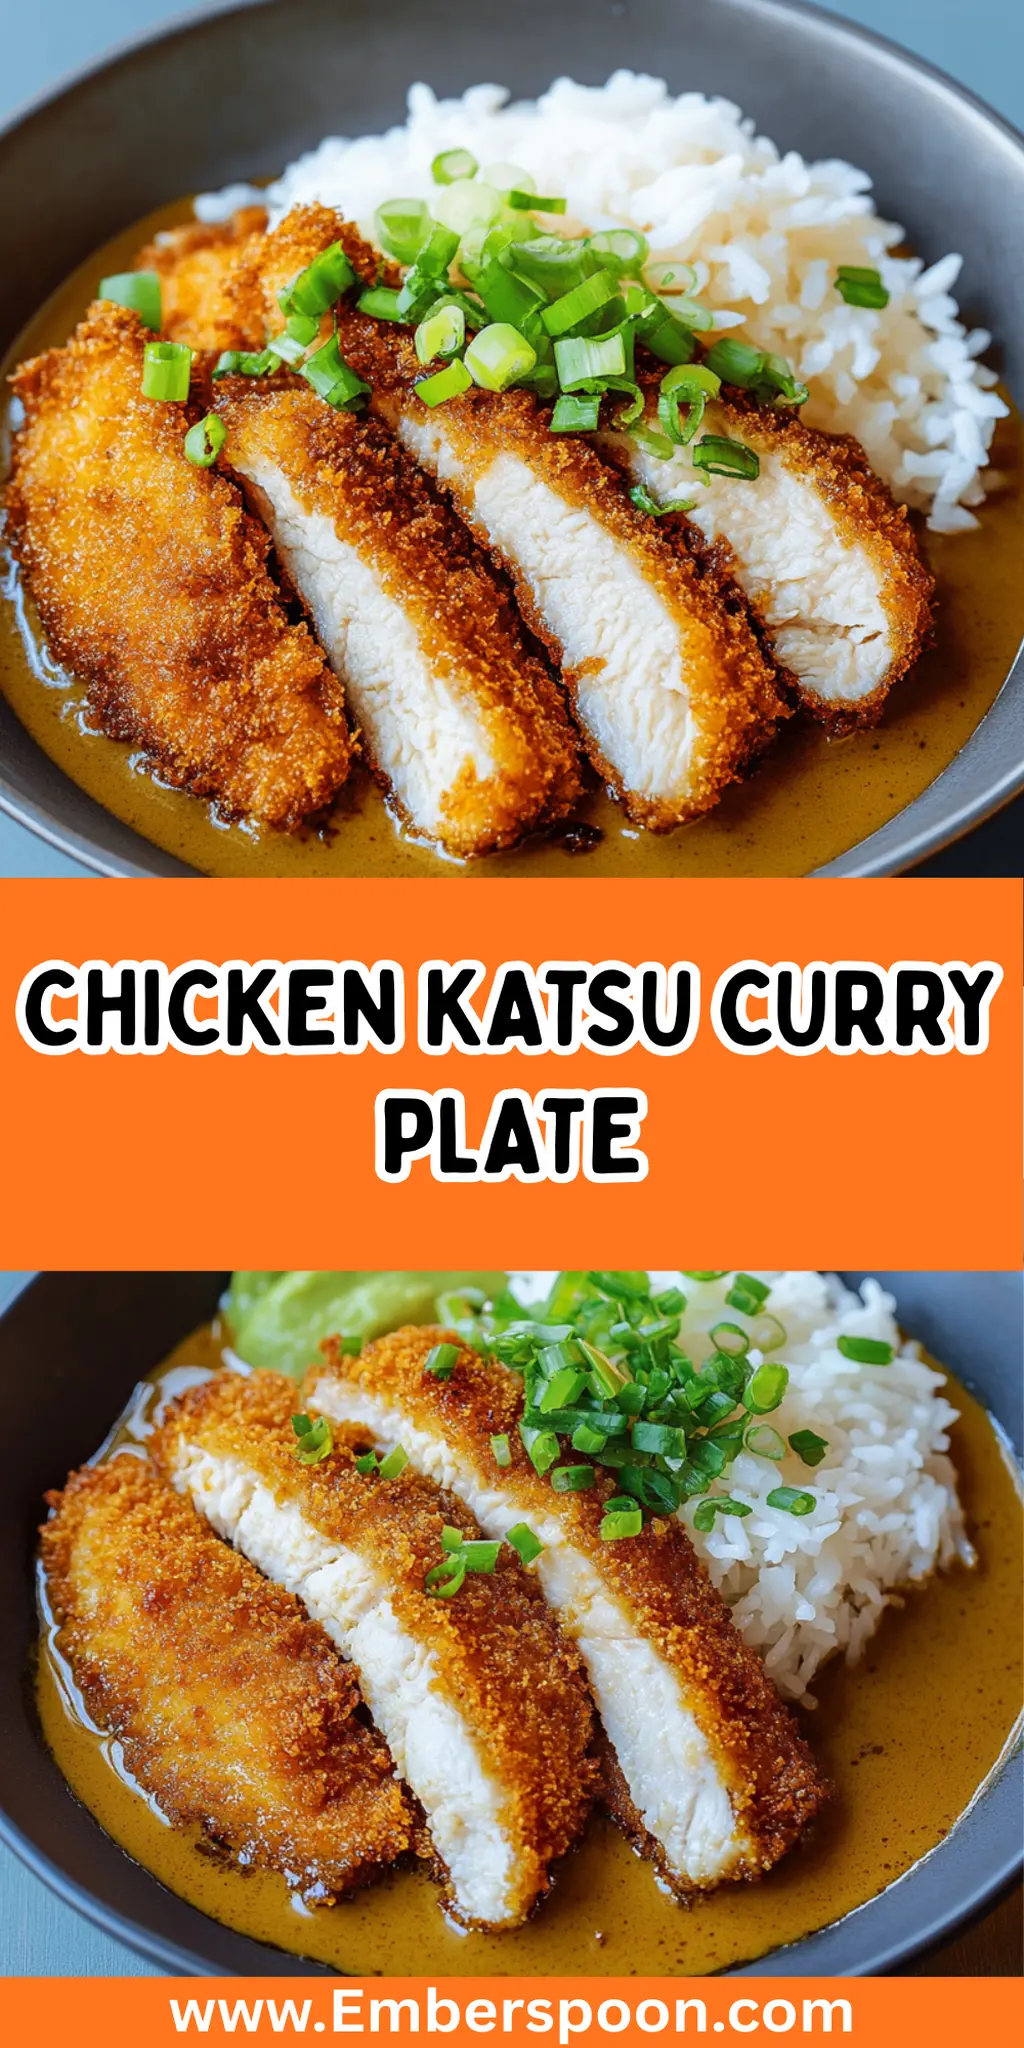
Assemble the Plate: Serve a generous portion of cooked rice on a plate, topped with the sliced chicken katsu, and ladle the warm curry sauce over the top.
-
Garnish and Enjoy: Add chopped green onions as a fresh garnish if desired. Dig in and experience the comforting flavors of your homemade Chicken Katsu Curry Plate!
Optional: A drizzle of sriracha adds a delightful kick!
Exact quantities are listed in the recipe card below.
Make Ahead Options
These Chicken Katsu Curry Plates are perfect for busy home cooks who want to save time on hectic weeknights! You can prepare the chicken and curry sauce components up to 24 hours in advance. Simply bread the chicken and store it in the refrigerator, layered with parchment paper to prevent sticking, and keep the curry sauce in an airtight container. When you’re ready to serve, fry the chicken straight from the fridge—this maintains its crispy texture. Reheat the curry sauce on the stovetop over low heat, stirring occasionally, and it will taste just as delicious! This way, you can enjoy a hearty, homemade meal with minimal effort, turning your weeknight into a special occasion!
What to Serve with Chicken Katsu Curry Plate?
Transform your meal into a feast with delightful sides that complement the crispy chicken and rich curry sauce.
-
Steamed Broccoli: Adds a vibrant green touch and a slight crunch, perfect for balancing the flavors.
-
Miso Soup: A warm, umami-rich soup complements the dish’s Japanese inspiration while enhancing your dining experience.
-
Pickled Vegetables: Offers a refreshing and tangy contrast to the hearty curry, cleansing the palate beautifully.
-
Coconut Rice: Creamy coconut rice adds an exotic sweetness that pairs harmoniously with the spicy curry sauce.
-
Cucumber Salad: Crisp cucumbers in a light dressing provide a refreshing crunch, balancing the richness of the katsu.
-
Japanese Beer or Sake: Enjoying your meal with a chilled beer or sake enhances the flavors and creates a lovely dining atmosphere.
-
Green Tea: A gentle, earthy beverage that aids digestion and serves as a soothing accompaniment to your flavorful plate.
Each of these pairings brings a unique taste and texture to your table, making every bite of your Chicken Katsu Curry Plate even more delightful!
How to Store and Freeze Chicken Katsu Curry Plate
Fridge: Store any leftover Chicken Katsu Curry Plate in an airtight container for up to 3 days. Reheat gently on the stovetop to maintain the crispness of the chicken.
Freezer: For longer storage, freeze the chicken and curry sauce separately in airtight containers for up to 3 months. Thaw in the fridge overnight before reheating.
Reheating: To reheat, warm the curry sauce on the stovetop over low heat and pan-fry the chicken for a few minutes to restore its crunch. Enjoy the comforting flavors all over again!
Chicken Katsu Curry Plate Variations
Feel free to get creative and personalize your Chicken Katsu Curry Plate! Each variation brings its own unique twist to this comforting classic.
-
Gluten-Free: Substitute all-purpose flour and panko with gluten-free variants for a celiac-friendly dish. Enjoy the same crunch and flavor without worry!
-
Vegan Delight: For a plant-based alternative, use tofu or tempeh in place of chicken, and replace eggs with a mixture of ground flaxseed and water.
-
Spicy Twist: Add a teaspoon of chili powder or diced jalapeños to the sauce for a fiery kick that complements the curry beautifully.
-
Creamy Addition: Stir in a splash of coconut milk into the curry sauce for a rich, creamy texture that enhances the warm spices.
-
Vegetable Boost: Toss in extra veggies like bell peppers, broccoli, or snap peas to the curry for added nutrients and color. This not only elevates the dish but makes it even more satisfying!
-
Rice Swap: Instead of regular rice, use quinoa or cauliflower rice for a healthier, low-carb option that pairs nicely with the curry.
-
Sweet and Sour: For an extra layer of flavor, add a splash of apple cider vinegar or a dash of lime juice to brighten the curry sauce.
-
Herb Infusion: Sprinkle fresh cilantro or basil over the finished dish for a fresh burst of flavor that adds a beautiful pop of color.
With these variations, your Chicken Katsu Curry Plate can transform into something new and exciting each time. Enjoy the journey of flavor you create!
Chef's Helpful Tips
- When making Chicken Katsu Curry Plate, ensure the chicken is pounded to an even thickness for uniform cooking.
- Avoid overcrowding the skillet while frying the chicken; this allows for even heat distribution and a crispy coating.
- To achieve an extra crunchy texture, press the panko breadcrumbs firmly onto the chicken before frying.
- Keep an eye on the oil temperature; if it’s too hot, the coating may burn before the chicken cooks through.
Chicken Katsu Curry Plate Recipe FAQs
What kind of chicken is best for Chicken Katsu Curry Plate?
Absolutely! Boneless, skinless chicken breasts are ideal for this dish because they remain juicy and tender during cooking. If you’re looking for a more flavorful option, consider using chicken thighs, which can also provide a richer taste.
How should I store leftover Chicken Katsu Curry Plate?
Store any leftover Chicken Katsu Curry Plate in an airtight container in the fridge for up to 3 days. To reheat, gently warm the curry sauce on the stovetop and pan-fry the chicken for a few minutes to restore its crispness. Enjoy that homemade goodness again!
Can I freeze Chicken Katsu Curry Plate?
Yes! For long-term storage, freeze the chicken katsu and curry sauce separately. Place them in airtight containers or freezer bags and label them. They can last for up to 3 months in the freezer. Thaw overnight in the refrigerator before reheating.
What if my panko coating isn’t sticking to the chicken?
Very! If you find that the panko isn’t sticking, try using a thicker layer of flour and ensure the eggs are well-beaten. Another tip is to press the breadcrumbs firmly onto the chicken while coating. This can help create a more adhesive layer for that perfect crunch!
How do I adjust the spice level in the curry sauce?
I recommend starting with 1 tablespoon of curry powder for a mild flavor. If you prefer more heat, gradually add an extra tablespoon and taste as you go. You can also add a pinch of cayenne pepper for an added kick if desired!
Is this recipe suitable for people with allergies?
When it comes to dietary considerations, keep in mind that this recipe contains gluten due to the flour and panko breadcrumbs. For a gluten-free version, substitute the flour with a gluten-free blend and choose gluten-free panko. Always check your chicken broth labels for any other allergens if needed.
Chicken Katsu Curry Plate
Ingredients
- 2 pieces Boneless, skinless chicken breasts a tender and juicy choice
- 1 cup All-purpose flour or gluten-free flour
- 2 large Eggs beaten
- 1 cup Panko breadcrumbs for extra crunch
- to taste Salt
- to taste Pepper
- 1 cup Vegetable oil for frying
- 1 tablespoon Vegetable oil for sautéing
- 1 medium Onion finely chopped
- 2 cloves Garlic minced
- 1 tablespoon Ginger grated
- 2 medium Carrots sliced
- 2 cups Chicken broth or vegetable broth for vegetarian
- 2 tablespoons Curry powder to taste
- 2 tablespoons Soy sauce or tamari for gluten-free
- 1 tablespoon Honey optional for sweetness
- 2 cups Cooked rice jasmine or basmati recommended
- 2 tablespoons Chopped green onions optional for garnish
Method
- Pound the chicken between plastic wrap until 1/2 inch thick.
- Season both sides with salt and pepper.
- Set up three shallow bowls with flour, beaten eggs, and panko.
- Dredge chicken in flour, then egg, then panko.
- Heat oil in skillet over medium heat.
- Fry chicken for 4-5 minutes per side until golden.
- Drain on paper towels.
- Sauté onion, garlic, and ginger in oil for 3-4 minutes.
- Add carrots and cook for 2-3 minutes.
- Pour in broth, curry powder, soy sauce, and honey. Simmer for 10-15 minutes.
- Slice the fried chicken.
- Serve rice topped with chicken and curry sauce.
- Garnish with green onions if desired.
Leave a Comment