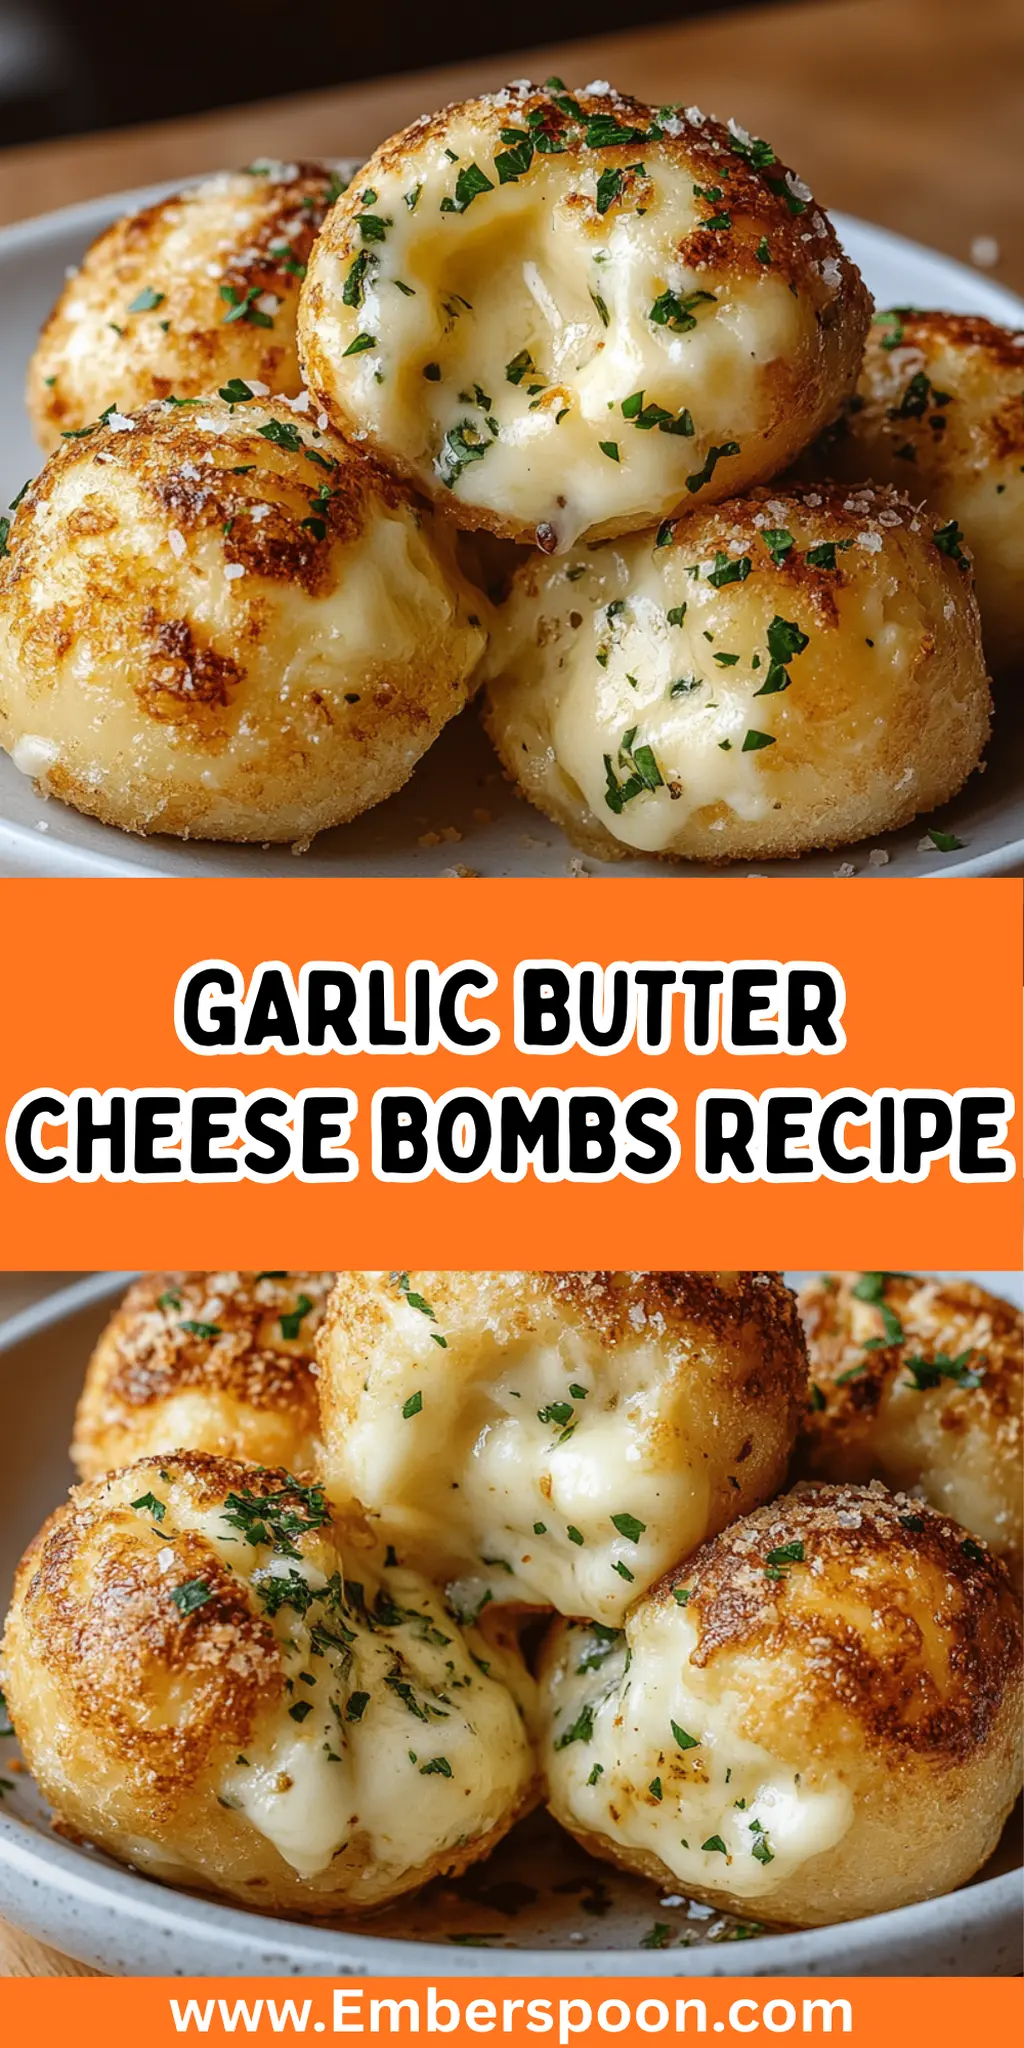
When the scent of roasted garlic mingles with warm, melted cheese in my kitchen, I can’t help but feel a little giddy. Recently, while searching for something comforting yet quick to whip up, I came across a delightful idea that transformed my evening snack into a culinary delight: Garlic Butter Cheese Bombs. These golden, bite-sized treasures are not only irresistibly gooey but also incredibly simple to make, which is a huge win for any home cook.
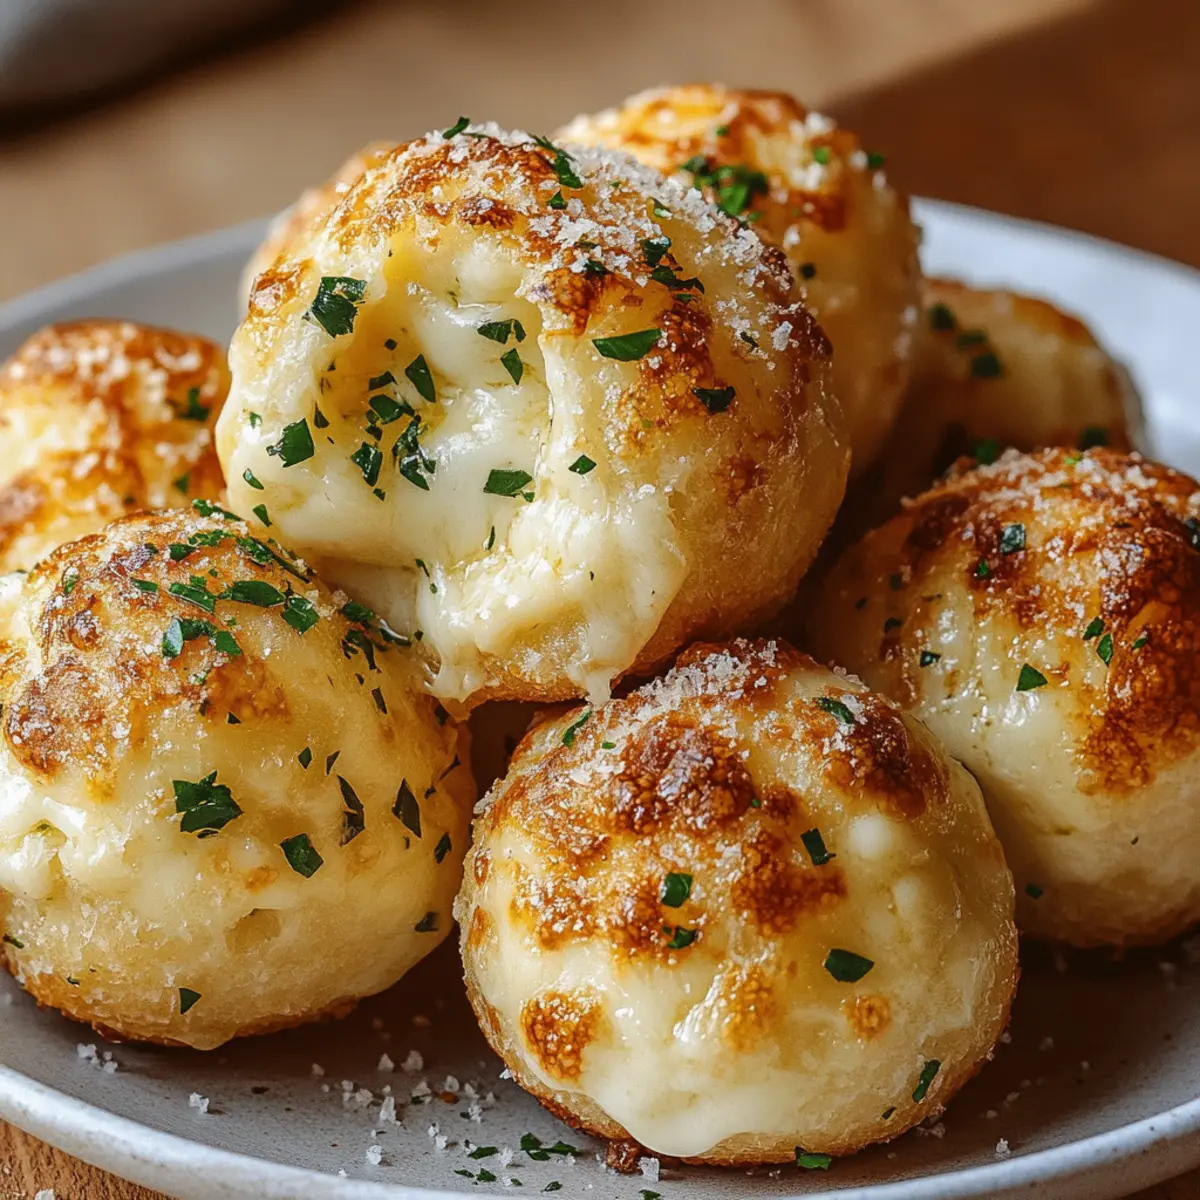
Whether you’re entertaining guests or just treating yourself after a long day, these cheese bombs promise to be the star of the show. Imagine the joy of pulling a tray of freshly baked delights from your oven—each one bursting with the rich flavors of garlic, butter, and mozzarella cheese. Best of all, they come together in just 30 minutes! With a handful of ingredients and easy-to-follow steps, you’ll find that these little wonders are perfect for anyone tired of fast food or looking for a cozy homemade alternative. So roll up your sleeves and get ready to impress with this Garlic Butter Cheese Bombs Recipe!
Why You'll Love This Garlic Butter Cheese Bombs Recipe
- These Garlic Butter Cheese Bombs are incredibly easy to make, allowing you to whip up a delicious snack in just 30 minutes.
- The rich flavors of garlic and gooey mozzarella create an irresistible treat that will have everyone coming back for more.
- Their versatility means they can be served as an appetizer, party snack, or even a comforting evening indulgence.
- Plus, the visually appealing golden-brown finish makes these cheese bombs a showstopper on any table.
Garlic Butter Cheese Bombs Ingredients
• Get ready to create a cheesy sensation!
For the Cheese Filling
• Shredded mozzarella cheese – essential for that gooey, melty texture that makes these garlic butter cheese bombs irresistible.
For the Dough
• Refrigerated biscuit dough – a time-saver that ensures your cheese bombs come together in a snap with no fuss!
For the Garlic Butter Mixture
• Unsalted butter – lends richness and is the perfect base for the flavorful garlic infusion.
• Garlic cloves – fresh minced garlic brings warmth and depth to each bite. Use more if you love garlic!
• Dried parsley – adds a beautiful pop of color and a hint of earthiness.
• Salt – enhances all the flavors in this delicious garlic butter cheese bombs recipe.
• Black pepper – gives a subtle kick that balances the richness of the cheese and butter.
For Topping (Optional)
• Grated Parmesan cheese – sprinkle on top for an extra layer of flavor and a delightful savory crust.
How to Make Garlic Butter Cheese Bombs
-
Preheat your oven: Begin by setting your oven to 375°F (190°C). This ensures that your cheese bombs will bake evenly while you prepare the rest of the ingredients. Don’t forget to line your baking sheet with parchment paper for easy cleanup!
-
Prepare the biscuits: Open the can of refrigerated biscuit dough and gently separate each biscuit. With your hands, flatten them slightly to create a perfect little pocket for the cheese filling you’ll soon add.
-
Add cheese: Place about 1 tablespoon of shredded mozzarella cheese right in the center of each flattened biscuit. This cheesy heart will melt beautifully, creating a delightful surprise when you bite into your cheese bomb!
-
Seal tightly: Carefully fold the edges of the biscuit over the cheese, ensuring you pinch them together well to avoid any leakage. Roll each biscuit into a ball shape and place them seam-side down on your prepared baking sheet.
-
Make the garlic butter: In a small saucepan, melt the unsalted butter over low heat to keep it from burning. Once melted, it’s time to whip in the minced garlic, dried parsley, salt, and black pepper until everything is well combined.
-
Brush with flavor: Generously brush the garlic butter mixture over each of the cheese bombs. This will give them that glorious buttery, garlicky flavor we all crave!
-
Bake to perfection: Place your baking sheet in the preheated oven and bake for 12–15 minutes. Keep an eye on them until they’re a beautiful golden brown—this is when they’ll be perfectly fluffy and tasty.
-
Add Parmesan (if desired): If you want to elevate your garlic butter cheese bombs even further, sprinkle grated Parmesan cheese over the tops right after they come out of the oven for an irresistible finish.
-
Serve and enjoy: These delicious cheese bombs are best served warm, so grab some marinara sauce or ranch dressing for dipping and prepare for a cheesy explosion of flavor!
Optional: For added spice, consider a sprinkle of crushed red pepper flakes on the cheese before sealing.
Exact quantities are listed in the recipe card below.
How to Store and Freeze Garlic Butter Cheese Bombs
Room Temperature: Keep your garlic butter cheese bombs at room temperature for up to 2 hours if you’re serving them at a gathering. Any longer, and they should be refrigerated to stay fresh.
Fridge: Store leftover cheese bombs in an airtight container in the fridge for up to 3 days. This keeps them moist and tasty for your next snack attack!
Freezer: For longer storage, freeze the cheese bombs in a zip-top bag for up to 2 months. Make sure to lay them flat before sealing to save space!
Reheating: To reheat, simply pop them in the oven at 350°F (175°C) for about 10-12 minutes until they’re heated through and crispy again. Enjoy the warm, gooey delight!
Make Ahead Options
These Garlic Butter Cheese Bombs are incredibly convenient for meal prep! You can prepare the biscuit balls filled with cheese up to 24 hours in advance, keeping them tightly sealed in an airtight container in the refrigerator to maintain freshness and prevent them from drying out. Just make sure to brush on the garlic butter mixture before baking for that mouthwatering flavor. When you’re ready to enjoy, simply bake them straight from the fridge; there’s no need to let them sit at room temperature. In just 12–15 minutes, you’ll have warm, cheesy delights, perfect for a last-minute snack or gathering!
Garlic Butter Cheese Bombs Variations
Feel free to switch things up and make this recipe your own with these delicious ideas!
-
Herb-Infused: Add fresh herbs like basil or thyme to the garlic butter for an aromatic twist that enhances the flavor profile.
-
Spicy Kick: Mix in some red pepper flakes or diced jalapeños for those who enjoy a bit of heat in their cheesy bites.
-
Different Cheese: Experiment with different cheeses, such as cheddar or pepper jack, to give your cheese bombs a unique flavor.
-
Stuffed with Meat: Incorporate small pieces of cooked bacon or pepperoni in each cheese-filled biscuit for a savory surprise.
-
Sweet Twist: For a dessert option, insert chocolate chips instead of cheese and brush with melted butter mixed with cinnamon and sugar.
-
Vegan Version: Use plant-based biscuit dough, dairy-free cheese, and vegan butter for a deliciously inclusive treat that everyone can enjoy!
-
Garlic Lover: Amp up the garlic by adding roasted garlic paste to the butter mixture for a richer, sweeter flavor that melts in your mouth.
-
Onion Love: Throw in some finely chopped green onions or sautéed onions into your cheese filling for a hearty, savory addition.
With these variations, your Garlic Butter Cheese Bombs will always have something new to surprise and delight your taste buds!
What to Serve with Garlic Butter Cheese Bombs?
These delightful bites are perfect for complementing with other dishes, creating a multi-sensory feast that warms the heart and satisfies the palate.
- Marinara Sauce: A rich and tangy dip that beautifully balances the richness of the cheese, enhancing every scrumptious bite.
- Ranch Dressing: Creamy and zesty, ranch adds a cool contrast, making it irresistible for dipping your cheese bombs.
- Fresh Garden Salad: A light side that offers a crisp, refreshing crunch, brightening your meal with vibrant colors and flavors.
- Creamy Tomato Soup: The warming, comforting qualities of tomato soup invite cozy moments, making your cheese bombs even more delightful.
- Garlic Bread: Similar flavor profiles create a heavenly experience, perfect for those who can’t resist garlic and butter!
- Stuffed Mushrooms: These savory bites echo the flavors of garlic and cheese, bringing a fun variety to your appetizer spread.
- Crisp White Wine: A chilled glass of Sauvignon Blanc or Pinot Grigio will elevate your feast, refreshing your palate after each cheesy morsel.
- Chocolate Mousse: End your meal on a sweet note with this smooth, velvety dessert that adds a luxurious finish to a cheesy affair.
Chef's Helpful Tips
- For the best results when making garlic butter cheese bombs, ensure you flatten the biscuit dough evenly to create a good pocket for the cheese.
- Avoid overfilling with cheese to prevent leaks while baking, as this keeps your bombs intact and fluffy.
- When making the garlic butter mixture, let the butter cool slightly before adding the garlic to prevent it from burning and turning bitter.
- Bake the cheese bombs until they are golden brown and puffed up, checking at the 12-minute mark for perfect doneness.
Garlic Butter Cheese Bombs Recipe FAQs
How do I choose the right garlic for this recipe?
Absolutely! When selecting garlic, look for firm bulbs with tight, unbroken skins. Fresh garlic should feel heavy in your hand and smell pungent. Avoid garlic with sprouting green shoots or soft spots.
How should I store leftover Garlic Butter Cheese Bombs?
To keep your delicious cheese bombs fresh, store them in an airtight container in the fridge for up to 3 days. This will prevent them from drying out and keep them soft and cheesy for your next craving!
Can I freeze Garlic Butter Cheese Bombs?
Yes, indeed! For freezing, allow the cheese bombs to cool completely, then place them in a single layer on a baking sheet and freeze until solid. Once frozen, transfer them to a zip-top bag for up to 2 months. Remember to lay them flat to save space!
What if my cheese bombs leak while baking?
If your cheese bombs leak, don’t fret! It usually happens if they are overfilled or not sealed tightly. Next time, ensure you only use about 1 tablespoon of cheese and pinch the edges tightly before baking. A quick tip is to check them at the 12-minute mark to ensure they’re puffing beautifully!
Are Garlic Butter Cheese Bombs safe for pets?
Not really! While these cheese bombs are delightful for humans, they contain garlic and salt, which can be harmful to pets, especially dogs. It’s best to keep them for yourself and your guests.
What if I have a dairy allergy?
If you’re looking for a dairy-free option, consider using dairy-free cheese substitutes made from nuts or soy in place of mozzarella. Also, replace the unsalted butter with a plant-based butter or margarine to ensure everyone can enjoy the cheesy goodness!
Garlic Butter Cheese Bombs Recipe
Ingredients
- 1 cup Shredded mozzarella cheese essential for that gooey, melty texture
- 1 can Refrigerated biscuit dough a time-saver
- 1/2 cup Unsalted butter lends richness
- 3 cloves Garlic cloves, minced fresh minced garlic brings warmth
- 1 tablespoon Dried parsley adds color and earthiness
- 1 teaspoon Salt enhances flavors
- 1/2 teaspoon Black pepper gives subtle kick
- 1/4 cup Grated Parmesan cheese for an extra layer of flavor
Method
- Preheat your oven to 375°F (190°C) and line your baking sheet with parchment paper.
- Gently separate each biscuit from the refrigerated biscuit dough and flatten them slightly.
- Place about 1 tablespoon of shredded mozzarella cheese in the center of each flattened biscuit.
- Fold the edges of the biscuit over the cheese, seal tightly, and roll into a ball shape.
- In a small saucepan, melt the unsalted butter over low heat and mix in the minced garlic, dried parsley, salt, and black pepper.
- Brush the garlic butter mixture generously over each cheese bomb.
- Bake for 12-15 minutes until golden brown.
- Sprinkle grated Parmesan cheese on top after baking if desired.
- Serve warm, optionally with marinara sauce or ranch dressing for dipping.


Leave a Comment