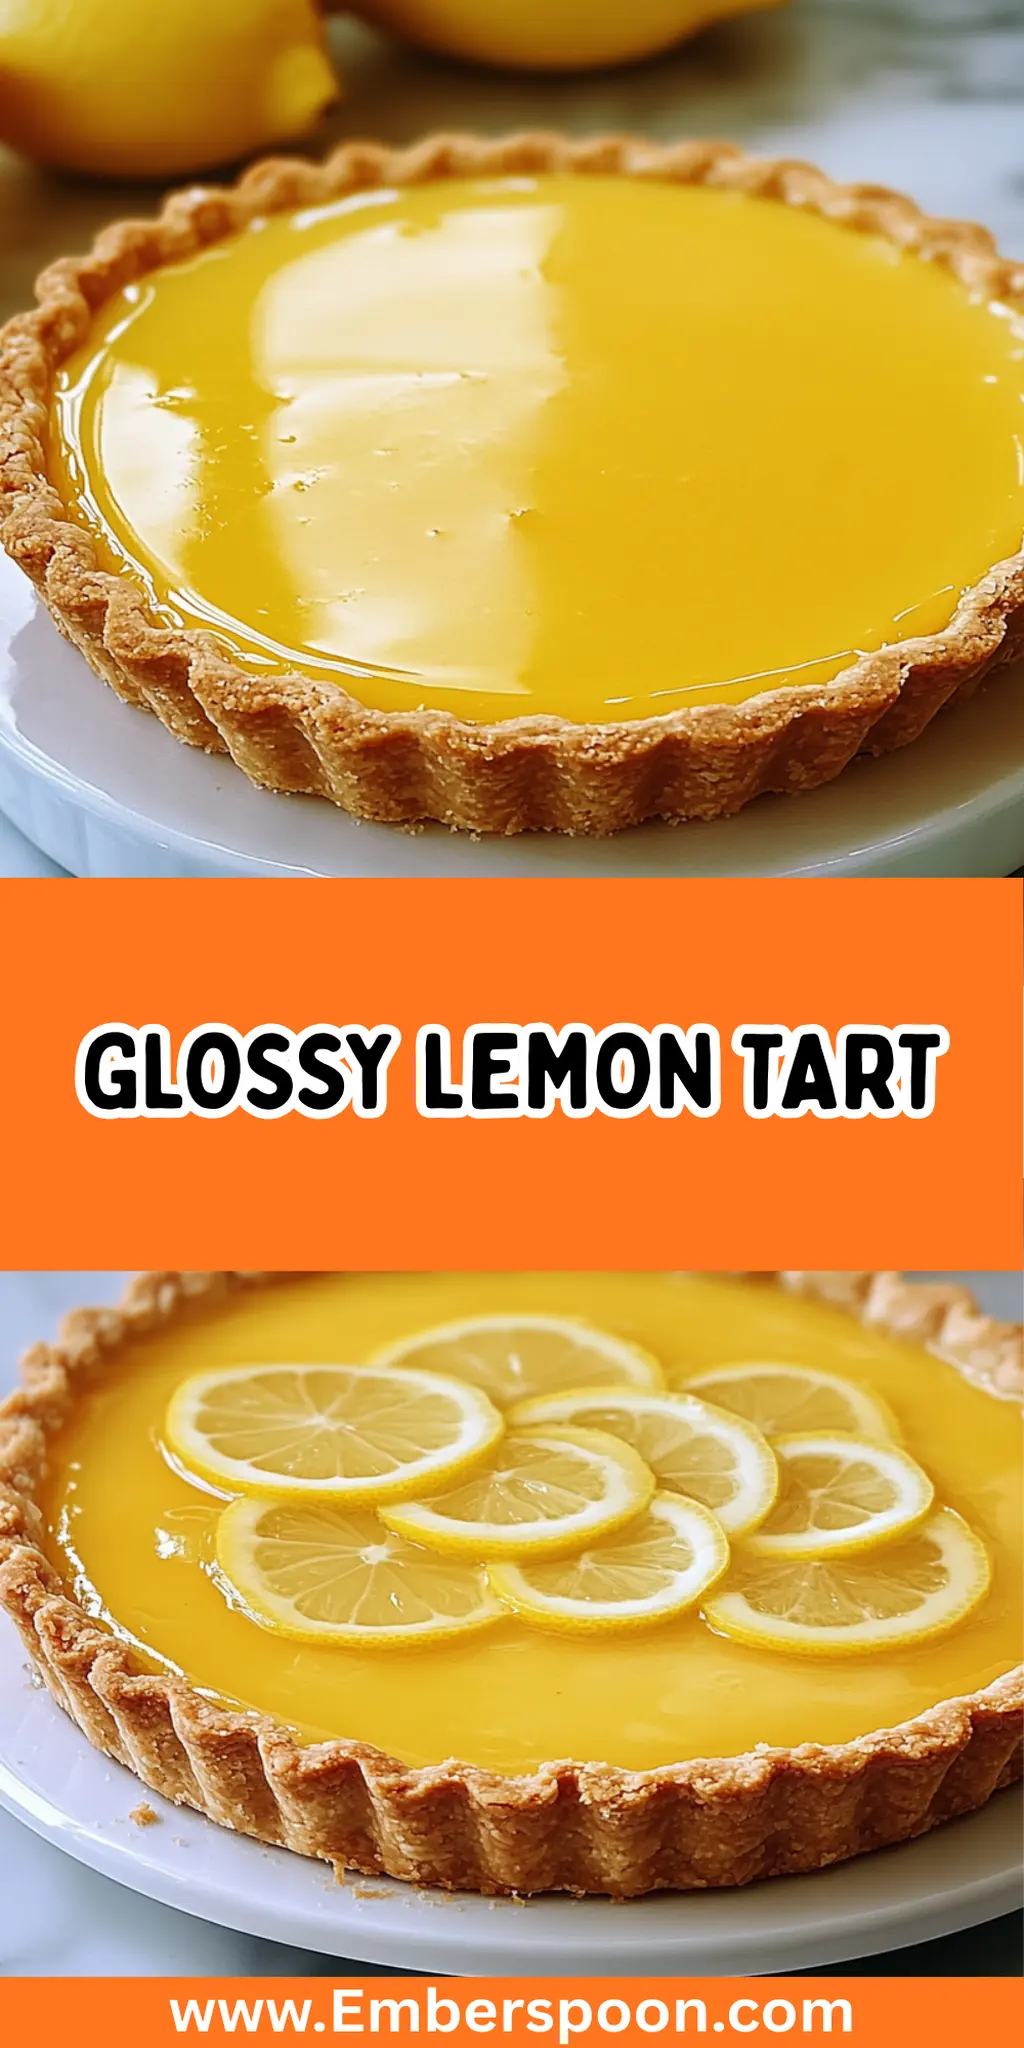
The first time I tasted a glossy lemon tart, it felt like sunshine on my palate. The vibrant flavor of fresh lemons dances beautifully against a buttery crust, creating a dessert that’s as uplifting as it is indulgent. After a particularly taxing week, I found myself yearning for a sweet escape, and this tart was the answer—a slice of tart goodness that feels both luxurious and comforting.
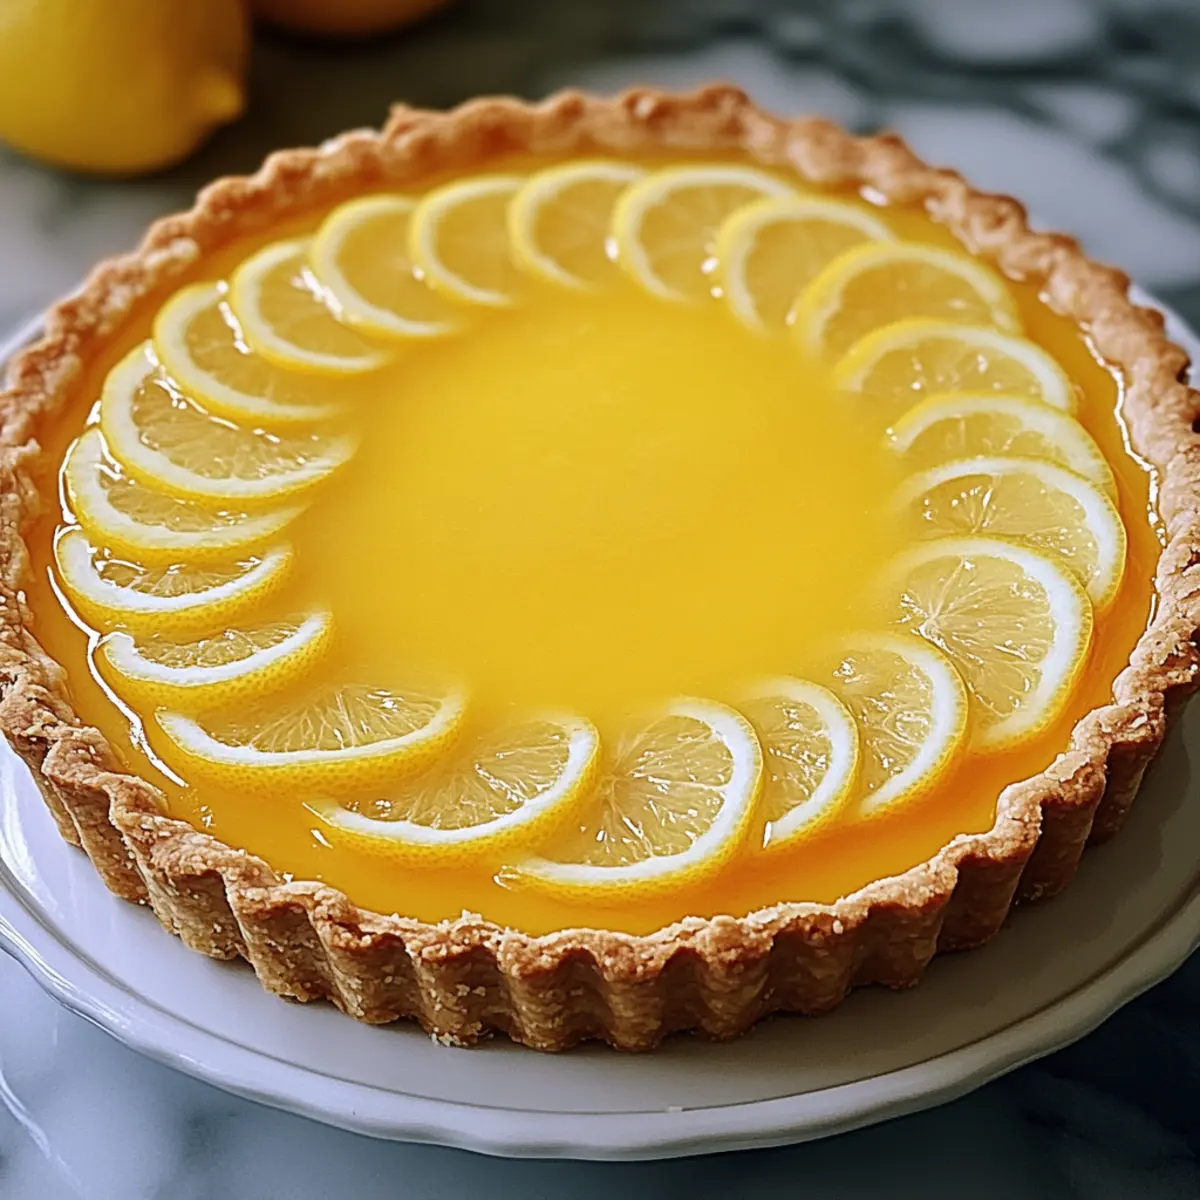
What makes this recipe stand out is its effortless elegance; you’ll impress any guests without spending all day in the kitchen. Each bite is a delightful fusion of zest and cream, topped with a shimmering glaze that feels celebratory. Whether you’re hosting a dinner party or simply treating yourself, this glossy lemon tart adds a touch of sophistication and brightness that leaves everyone smiling. So, let’s dive into how you can create this refreshing slice of happiness, perfect for elevating any occasion.
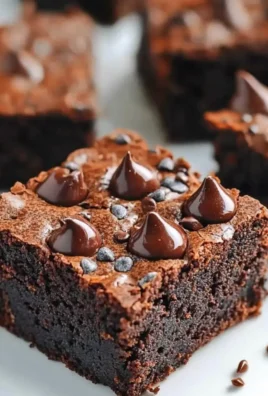
Why You'll Love This Glossy Lemon Tart
- This glossy lemon tart is incredibly easy to make, allowing you to whip it up without spending hours in the kitchen.
- The vibrant flavors of lemon combined with rich cream create a delicious balance that will keep your taste buds dancing.
- Its versatility makes it perfect for any occasion, whether it’s a relaxing afternoon treat or a show-stopping dessert at a dinner party.
- With its stunning glossy finish, this tart is not only a delight to eat but also a visual centerpiece that will impress your guests and leave them wanting more.
Glossy Lemon Tart Ingredients
For the Tart Crust
• All-purpose flour – the base for a sturdy yet tender crust.
• Unsalted butter – cold and cubed for a flaky texture; keep it chilled!
• Powdered sugar – adds a slight sweetness to the crust without graininess.
• Salt – enhances the flavors of the crust; don’t skip it!
• Egg yolk – provides richness and helps bind the dough.
• Cold water – add gradually to bring the dough together without making it sticky.
For the Lemon Filling
• Large eggs – the key ingredient for a creamy filling; room temperature helps them mix better.
• Granulated sugar – balances the tartness of the lemons for a delightful sweetness.
• Fresh lemon juice – the star of the show; more lemons give a brighter flavor.
• Lemon zest – intensifies the citrus aroma and flavor in the filling.
• Heavy cream – adds a luxurious texture to the filling, making it rich and velvety.
For the Glaze
• Water – serves as the base for the glaze.
• Granulated sugar – sweetens the glaze, enhancing the overall flavor of the tart.
• Cornstarch – thickens the glaze to the perfect consistency, ensuring it sets well.
• Fresh lemon juice – adds a zesty kick to the glaze; a must for a glossy lemon tart!
• Lemon zest – for an extra layer of flavor and fragrance in the glaze.
How to Make Glossy Lemon Tart
-
Mix the Crust: In a large bowl, combine the flour, powdered sugar, and salt. Add the cold cubed butter, mixing until the mixture resembles coarse crumbs, inviting those enticing aromas to fill your kitchen.
-
Form the Dough: Stir in the egg yolk, then add cold water, one tablespoon at a time. Keep mixing until the dough comes together; it should be soft but not sticky.
-
Chill the Dough: Shape the dough into a disk, wrap it in plastic wrap, and refrigerate for at least 30 minutes, allowing the flavors to meld and the crust to firm up.
-
Preheat the Oven: Set your oven to 350°F (175°C), filling your home with warmth and anticipation for the baking to come.
-
Roll the Dough: On a floured surface, roll out the chilled dough to fit a 9-inch tart pan. Gently press it into the pan and trim any excess edges to keep it tidy and beautiful.
-
Blind Bake the Crust: Line the crust with parchment paper and fill it with pie weights or dried beans. Bake for 15 minutes, then remove the weights and parchment, baking for an additional 10 minutes until lightly golden. Let cool completely.
-
Make the Filling: In a medium bowl, whisk together the eggs and granulated sugar until well blended. The color will become a lovely pale yellow.
-
Combine Lemon Ingredients: Stir in the fresh lemon juice and lemon zest, letting that invigorating citrus aroma brighten your day.
-
Incorporate Cream: Gently fold in the heavy cream until the mixture is smooth and creamy, feeling luxurious with each stir.
-
Fill the Tart Shell: Pour the lemon filling into the cooled tart shell, spreading it evenly, as you dream of that first refreshing bite.
-
Bake the Tart: Place the tart in the preheated oven and bake for 25-30 minutes, until the filling is set but still slightly jiggly in the center.
-
Cool the Tart: Remove it from the oven and let it cool to room temperature. After that, refrigerate for at least 2 hours to set that luscious filling.
-
Prepare the Glaze: In a small saucepan, combine water, granulated sugar, cornstarch, lemon juice, and lemon zest. Whisk until smooth, watching as it transforms into a beautiful glossy mixture.
-
Thicken the Glaze: Bring the glaze mixture to a boil over medium heat, stirring constantly until thickened. Remove from heat and let cool slightly.
-
Glaze the Tart: Pour the cooled glaze over the set lemon tart, spreading it evenly to create a glossy finish that glimmers like the sun.
-
Chill Again: Place the tart back in the refrigerator for another 30 minutes, allowing that beautiful glaze to set firmly.
-
Serve Chilled: Carefully slice the tart and serve chilled. Each slice is a masterpiece of flavor and texture, ready to delight your loved ones.
Optional: Dust with powdered sugar for an extra touch of sweetness.
Exact quantities are listed in the recipe card below.
Glossy Lemon Tart Variations
Feel free to make this tart your own with creative twists that elevate its delightful flavors!
-
Gluten-Free: Swap in a gluten-free flour blend for the crust. A combination of almond and coconut flour also imparts a unique flavor.
-
Dairy-Free: Replace heavy cream with coconut cream and use dairy-free butter. This results in a rich, indulgent variant suitable for everyone.
-
Herb-Infused: Add a hint of fresh herbs like thyme or basil to the lemon filling. The herbaceous notes will surprise and delight your taste buds!
-
Berries Galore: Top the tart with fresh berries after glazing. Strawberries or blueberries are not just pretty but add bursts of freshness with every bite.
-
Meringue Topping: For an extra layer of elegance, pipe meringue onto the tart and toast it lightly. It adds a beautiful finish and a sweet contrast.
-
Caramel Swirl: Drizzle caramel sauce into the lemon filling for a luscious flavor combination. The symphony of citrus and caramel will make your heart sing!
-
Lemon-Lavender Fusion: Infuse the cream with dried lavender prior to mixing. This summery fragrance adds a unique twist that pairs beautifully with lemon.
-
Spicy Kick: Sprinkle a pinch of cayenne pepper or finely grated ginger into the lemon filling for an unexpected, zesty heat that tantalizes your palate!
What to Serve with Glossy Lemon Tart?
What better way to enhance the joyful experience of a tart than by pairing it with delightful accompaniments that balance its brightness?
-
Fresh Berries: The natural sweetness and acidity of ripe berries complement the tart’s zestiness, adding vibrant color. A blend of strawberries, blueberries, and raspberries offers a refreshing bite that harmonizes beautifully with the lemon.
-
Whipped Cream: Lightly sweetened, fluffy whipped cream creates a luscious contrast to the tart’s crisp texture. A dollop on each slice enhances that luxurious feel, turning each bite into an indulgent experience.
-
Lemon Sorbet: Serve a scoop alongside the tart for double lemon delight! The invigorating chill and intensity of flavor in the sorbet provide a refreshing palate cleanser and amplify the lemony goodness.
-
Iced Herbal Tea: A chilled glass of herbal tea, perhaps infused with mint or chamomile, provides a soothing beverage that does not compete with the tart’s flavors. It keeps the overall experience light and refreshing.
-
Chocolate Drizzle: A drizzle of dark chocolate adds a rich, contrasting flavor to the tart. This unexpected pairing introduces a delightful complexity that elevates each bite to the next level of indulgence.
-
Coconut Macaroons: These chewy, sweet bites offer a delightful texture contrast against the smoothness of the tart. The subtle coconut flavor complements the citrus, creating a lovely palate adventure.
Let your creativity shine and enjoy this vibrant pairing with the glossy lemon tart!
How to Store and Freeze Glossy Lemon Tart
Fridge: Store the lemon tart in an airtight container in the refrigerator for up to 3 days. This keeps it fresh and preserves its delightful texture and flavor.
Freezer: If you’re looking to keep the tart for longer, freeze it without the glaze for up to 2 months. Wrap it tightly in plastic wrap and then aluminum foil to prevent freezer burn.
Thawing: To enjoy your frozen glossy lemon tart, transfer it to the fridge to thaw overnight. Once thawed, add the glaze for that perfect finish before serving.
Reheating: The tart is best served chilled and does not require reheating, but if you wish, let it sit at room temperature for about 30 minutes for the best flavor experience.
Make Ahead Options
These Glossy Lemon Tarts are perfect for meal prep enthusiasts craving a taste of sunshine! You can prepare the tart crust and fill it up to 24 hours in advance, allowing busy home cooks to enjoy a slice of luxury without the last-minute rush. Simply follow the steps to make the crust and fill, then allow the tart to cool and refrigerate. To maintain the quality, be sure to cover the tart loosely with plastic wrap after chilling. When you’re ready to serve, finish by adding the glaze and refrigerating for an additional 30 minutes to achieve that stunning glossy finish. Just like that, you’ll have a delightful dessert that’s just as refreshing as if made fresh that day!
Chef's Helpful Tips
- When making the Glossy Lemon Tart, ensure that your butter is extremely cold to achieve a flaky crust, as warm butter can result in a dense texture.
- Avoid overmixing the crust dough; mix just until the ingredients are combined to prevent toughness.
- For the lemon filling, using room temperature eggs will help them incorporate more smoothly, yielding a creamier texture.
- Bake the tart until the filling is set but slightly jiggly in the center; this will ensure a perfectly creamy result that sets nicely after chilling.
Glossy Lemon Tart Recipe FAQs
How do I choose ripe lemons for the Glossy Lemon Tart?
Absolutely! For the best flavor, choose lemons that are firm and heavy for their size, indicating juiciness. Look for vibrant yellow skin without any dark spots or blemishes, as these can signal overripeness. Fresh lemons should have a slight gloss and feel slightly soft when squeezed, which is a sign of ripeness and juiciness.
How should I store the Glossy Lemon Tart?
Very! You can store your lemon tart in an airtight container in the refrigerator for up to 3 days. This will keep it fresh and maintain its delightful texture. If you have leftovers, just make sure it’s well covered to prevent it from absorbing any fridge odors. Enjoy it cold straight from the fridge for the perfect treat!
Can I freeze the Glossy Lemon Tart?
Yes, indeed! To freeze, wrap the tart tightly in plastic wrap and then in aluminum foil to protect it from freezer burn. It’s best to freeze it without the glaze. You can keep it in the freezer for up to 2 months. When you’re ready to enjoy it, simply transfer it to the fridge to thaw overnight. Add the glaze just before serving for that shiny finish!
What if my tart filling doesn’t set properly?
If your filling doesn’t set and is too jiggly, it may need more baking time. When baking, start checking the tart at around 25 minutes; the filling should be set but still slightly jiggly in the center—a small “shake” test can help with this! If underbaked, return it to the oven for a few more minutes, but be careful not to overbake as the filling can become dense. If all else fails, you can always create a lemon glaze or sauce to pour over it!
Is this tart safe for those with allergies?
Good question! This glossy lemon tart contains gluten and dairy, so it’s not recommended for those with celiac disease or lactose intolerance. For a gluten-free alternative, you can use a gluten-free flour blend for the crust. If there are egg allergies, unfortunately, eggs are crucial for the filling, but you can experiment with a commercial egg replacer for different textures. Always make alterations based on personal allergies and preferences!
How long will the Glossy Lemon Tart stay fresh in the fridge?
Wonderful question! When stored properly in an airtight container, the tart will stay fresh for up to 3 days in the fridge. I often recommend enjoying it within the first couple of days for the brightest lemon flavor and ideal texture. After that, it’s still delightful, but the texture might slightly change.
Glossy Lemon Tart
Ingredients
- 1 cup all-purpose flour
- 1/2 cup unsalted butter cold and cubed
- 1/4 cup powdered sugar
- 1/4 teaspoon salt
- 1 large egg yolk
- 2-4 tablespoons cold water
- 3 large eggs room temperature
- 1 cup granulated sugar
- 1/2 cup fresh lemon juice
- 1 tablespoon lemon zest
- 1 cup heavy cream
- 1 cup water
- 1/2 cup granulated sugar
- 2 tablespoons cornstarch
- 1/4 cup fresh lemon juice
- 1 teaspoon lemon zest
Method
- In a large bowl, combine the flour, powdered sugar, and salt. Add the cold cubed butter, mixing until the mixture resembles coarse crumbs.
- Stir in the egg yolk, then add cold water, one tablespoon at a time until the dough comes together.
- Shape the dough into a disk, wrap it in plastic wrap, and refrigerate for at least 30 minutes.
- Preheat your oven to 350°F (175°C).
- On a floured surface, roll out the chilled dough to fit a 9-inch tart pan.
- Line the crust with parchment paper and fill with pie weights. Bake for 15 minutes, then remove weights and bake for another 10 minutes.
- In a medium bowl, whisk together the eggs and granulated sugar until well blended. Stir in the fresh lemon juice and lemon zest.
- Gently fold in the heavy cream until the filling is smooth.
- Pour the lemon filling into the cooled tart shell.
- Bake for 25-30 minutes until the filling is set but still slightly jiggly.
- Let the tart cool to room temperature, then refrigerate for at least 2 hours.
- In a small saucepan, combine water, sugar, cornstarch, lemon juice, and lemon zest; whisk until smooth.
- Bring the mixture to a boil over medium heat, stirring constantly until thickened.
- Pour the cooled glaze over the set lemon tart and spread evenly.
- Chill again for another 30 minutes before serving.
- Slice and serve chilled.
Leave a Comment