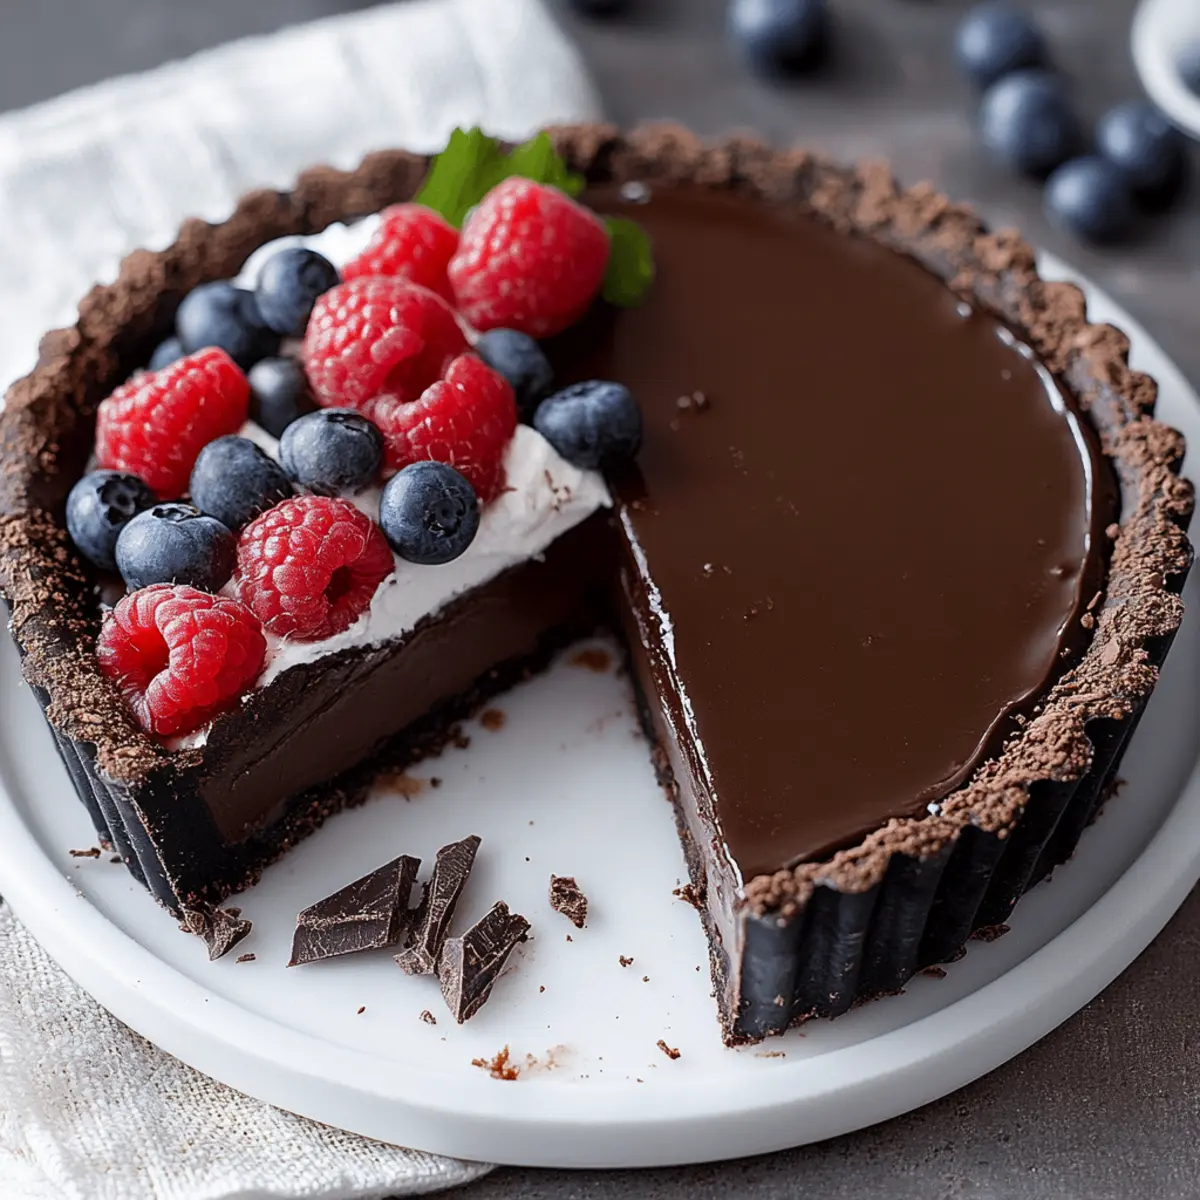
There’s something utterly enchanting about indulging in a rich dessert without even turning on the oven. Picture this: a creamy No-Bake Chocolate Tart that effortlessly combines the luxuriousness of silky chocolate with a luscious, crumbly crust—all coming together in a delightful treat. After a long day of juggling responsibilities or when you’re hosting friends for a cozy gathering, this tart is your secret weapon to impress without breaking a sweat.
I stumbled upon this recipe during one of those sweltering summer afternoons when the last thing I wanted was to heat up the kitchen. The ease of preparation—a mere 15 minutes of hands-on time—proved to be a game-changer. Each slice offers a blissful bite of chocolate tempered with the lightness of whipped cream and the freshness of berries, making it a crowd-pleaser everyone will adore. So grab your tart pan, and let’s dive into making this divine dessert that’s perfect for any occasion!
Why You'll Love This No-Bake Chocolate Tart
- This No-Bake Chocolate Tart is a breeze to whip up, taking only 15 minutes of hands-on time and no oven required.
- Delight in the rich, indulgent flavor of silky chocolate combined with a buttery crumb crust that melts in your mouth.
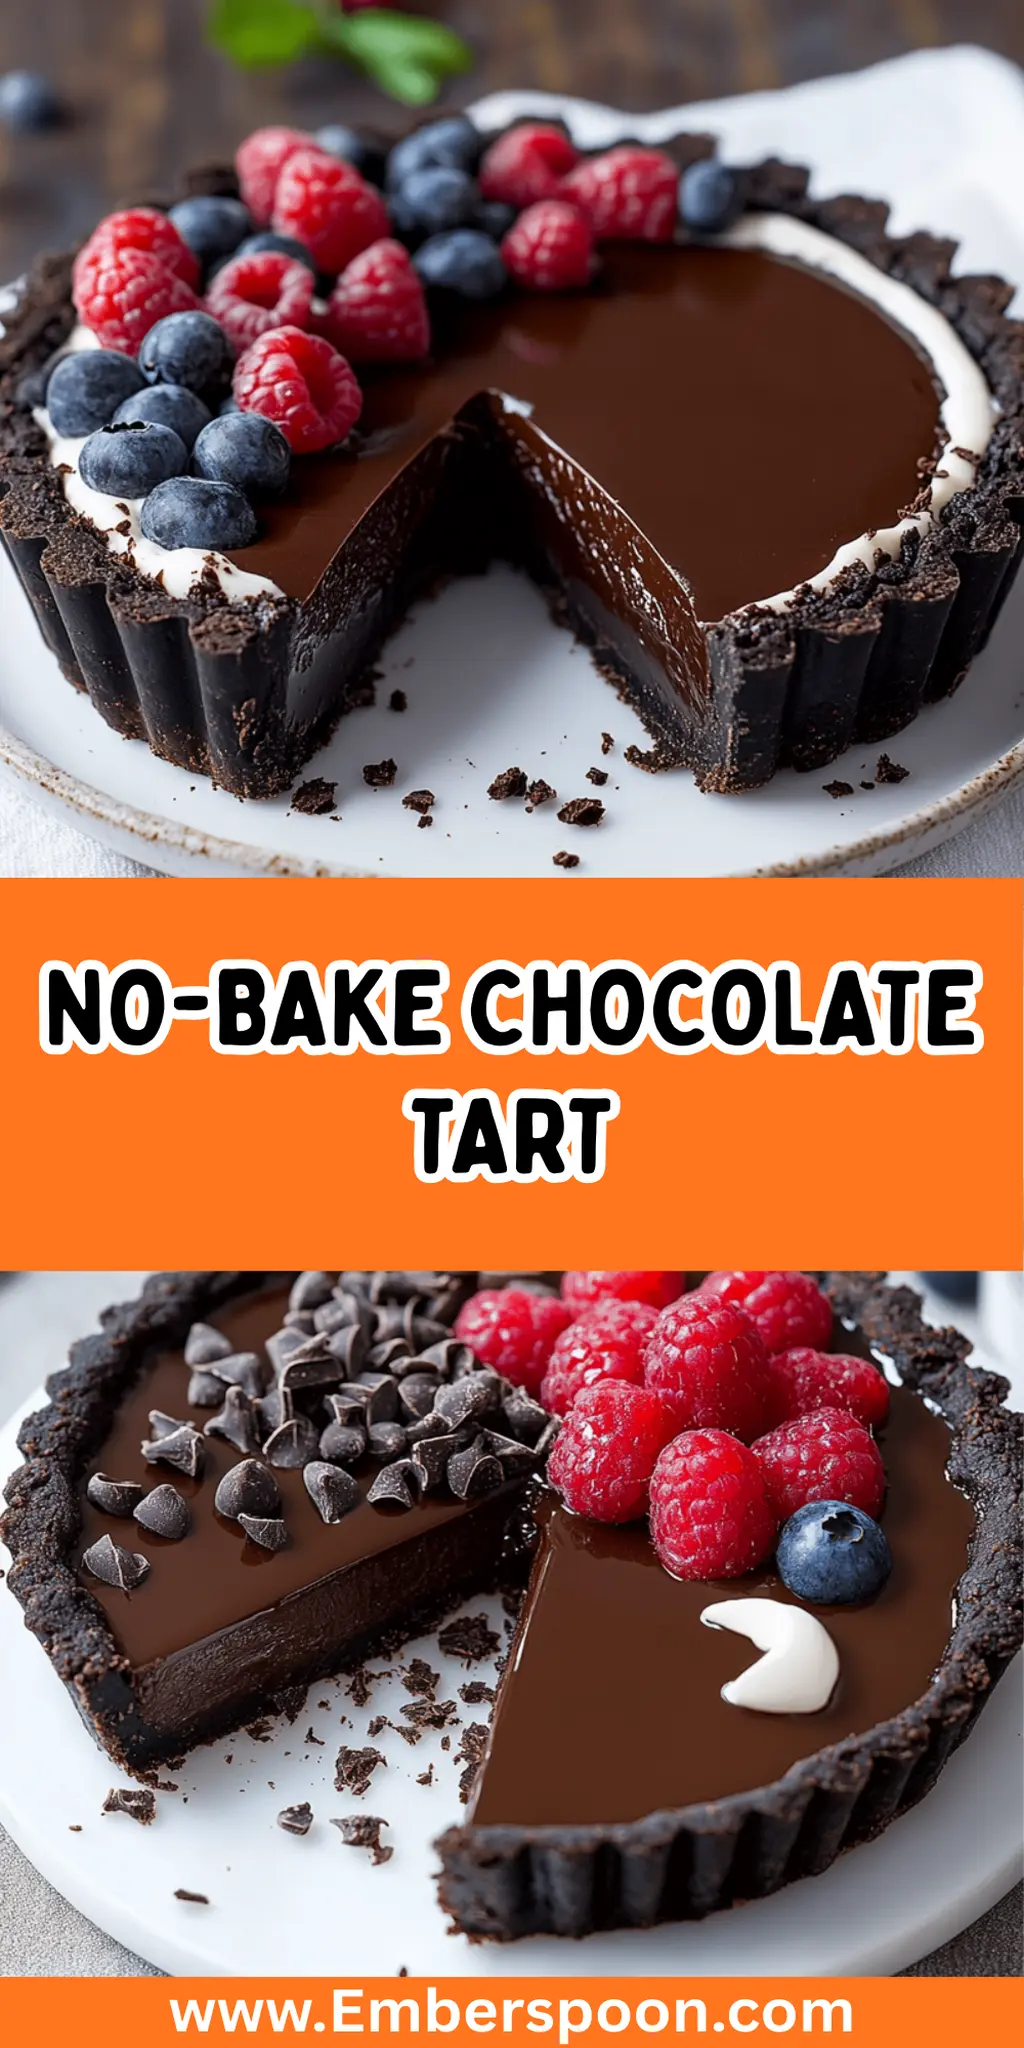
- Its versatility means you can dress it up with whipped cream, chocolate shavings, or fresh berries for an elegant presentation.
- Perfect for any gathering, this dessert is sure to impress your friends and family while saving you time and effort in the kitchen.
No-Bake Chocolate Tart Ingredients
For the Crust
• Chocolate cookie crumbs – essential for a rich, sweet base that complements the tart’s filling.
• Unsalted butter – helps bind the crumbs and adds a deliciously rich flavor.
For the Filling
• Heavy cream – creates a creamy, luxurious texture that enhances the overall decadence of the tart.
• Semi-sweet chocolate – the star of the show, providing that deep chocolatey flavor everyone loves in a No-Bake Chocolate Tart.
• Powdered sugar – adds just the right amount of sweetness to balance the richness of the chocolate.
• Vanilla extract – infuses a warm, aromatic layer of flavor that elevates the tart.
• Pinch of salt – amplifies the sweetness and enhances the chocolate flavor perfectly.
Optional Toppings
• Whipped cream – adds lightness and creaminess, making each slice even more delightful.
• Chocolate shavings – a fancy touch that adds texture and extra chocolatey goodness.
• Fresh berries – brightens the presentation and adds a refreshing element to each bite.
How to Make No-Bake Chocolate Tart
-
Mix the Crust: In a mixing bowl, combine the chocolate cookie crumbs and melted butter, stirring until the crumbs are evenly coated. This will create a delightful, rich base for your tart.
-
Press the Mixture: Press the mixture firmly into the bottom and up the sides of a 9-inch tart pan. Use the back of a measuring cup or your fingers to create an even layer, ensuring it holds together well.
-
Chill the Crust: Place the crust in the refrigerator to set while you prepare the filling, about 10-15 minutes. This helps the crust firm up and makes it easier to fill.
-
Heat the Cream: In a small saucepan over medium heat, bring the heavy cream to a simmer, removing from heat just before it starts boiling. The hot cream will melt the chocolate beautifully.
-
Add the Chocolate: Add the chopped semi-sweet chocolate to the hot cream and let it sit for 2-3 minutes to soften. This ensures a smooth, rich filling.
-
Whisk Together: Whisk the mixture until smooth and fully combined. Then, stir in the powdered sugar, vanilla extract, and a pinch of salt until well incorporated, creating a creamy filling.
-
Fill the Crust: Remove the crust from the refrigerator and pour the chocolate filling into the prepared crust. Use a spatula to spread it evenly, ensuring every bite is luscious.
-
Chill Again: Cover the tart with plastic wrap and place it in the refrigerator for at least 4 hours, or until the filling is set. Patience is key for that perfect texture!
-
Add Toppings: Once set, remove the tart from the refrigerator. Top with whipped cream, chocolate shavings, and fresh berries if desired for a beautiful finish.
-
Serve Chilled: Slice the tart and serve chilled, delighting your guests with every blissful bite of your homemade creation!
Optional: Serve with a sprinkle of sea salt for an extra flavor boost!
Exact quantities are listed in the recipe card below.
No-Bake Chocolate Tart Variations
Feel free to personalize your delicious tart with these fun twists that are sure to elevate your dessert experience.
-
Gluten-Free: Substitute the chocolate cookie crumbs with gluten-free chocolate cookies or crushed nuts for a delightful alternative that maintains great flavor.
-
Nutty Crunch: Add 1/2 cup of finely chopped nuts, like pecans or almonds, to the crust for an extra layer of texture and a delightful crunch in every bite.
-
Minty Fresh: Incorporate 1/2 teaspoon of peppermint extract into the filling for a refreshing twist that pairs beautifully with chocolate—perfect for refreshing gatherings.
-
Spicy Kick: Add a pinch of cayenne pepper or espresso powder to the filling for an unexpected warm undertone that enhances the rich chocolate flavor.
-
Cream Cheese Layer: Blend 8 ounces of softened cream cheese with the chocolate mixture for a richer, cheesecake-like filling that adds creaminess.
-
Fruit Fusion: Fold in 1 cup of pureed raspberries into the chocolate filling before pouring it into the crust for a burst of fruity flavor that balances the richness.
-
Dairy-Free Delight: Use coconut cream instead of heavy cream, and dairy-free chocolate for a creamy, indulgent option that everyone can enjoy.
-
Choco-Coconut Variation: Mix 1/2 cup of shredded coconut into the crust for a tropical flavor that complements the chocolate beautifully, making it a true delight!
How to Store and Freeze No-Bake Chocolate Tart
Fridge: Keep your No-Bake Chocolate Tart tightly covered with plastic wrap or in an airtight container in the refrigerator for up to 5 days. This ensures it stays fresh and delicious.
Freezer: If you want to store the tart for a longer period, you can freeze it for up to 2 months. Wrap the tart tightly in plastic wrap, then in aluminum foil to prevent freezer burn.
Thawing: To enjoy a frozen slice, simply transfer it to the refrigerator and let it thaw overnight. Avoid using a microwave, as this may affect the texture of the filling.
Serving Chilled: This tart is best served chilled straight from the fridge, enhancing the rich chocolate flavors and making each bite truly delightful!
What to Serve with No-Bake Chocolate Tart?
Imagine the joy of enjoying a rich, chocolatey delight alongside a carefully curated spread that tantalizes your taste buds and elevates your dessert experience.
-
Fresh Berries: Bursting with sweetness and tang, berries provide a refreshing contrast that lightens the chocolate’s richness. They not only look beautiful but also enhance the tasting experience with their vibrant flavor.
-
Creamy Vanilla Ice Cream: A scoop of this classic pairing melts wonderfully with the tart, adding an extra layer of indulgence. As you take a bite, the contrast in temperature and texture creates a delightful harmony—pure bliss!
-
Whipped Cream: Fluffy and light, whipped cream complements the dense tart perfectly. Its airy texture balances the creamy filling, making each forkful a dream come true.
-
Espresso or Coffee: The deep, robust flavors of a warm cup elevate the chocolate notes in the tart. Sipping on espresso alongside your dessert adds to the experience and brings just the right amount of energy to your evening.
-
Chocolate Sauce Drizzle: For the real chocolate lovers, adding a drizzle of rich chocolate sauce gives an extra dose of decadence. This creates a luxurious presentation and intensifies the chocolate flavor.
-
Shortbread Cookies: Their buttery crunch offers a delightful textural contrast against the smooth tart. Serve them on the side for a charming, sophisticated touch that enhances every bite.
-
Pecan Pie Bark: A chewy, nutty treat resonates beautifully with the creamy chocolate. The sweet, caramel hints add complexity and balance to your dessert table.
-
Mint Tea: Light and refreshing, this fragrant herbal tea cleanses the palate and makes for a soothing contrast to the rich tart. Pairing it with your chocolate delight will leave your guests feeling sophisticated and satisfied!
Make Ahead Options
These No-Bake Chocolate Tarts are perfect for busy weeknights and gatherings! You can prepare the crust and filling up to 24 hours in advance, allowing for a stress-free dessert experience. Simply mix the chocolate cookie crumbs and melted butter, press the mixture into the tart pan, and chill the crust. For the filling, make it and pour it into the set crust, then cover tightly with plastic wrap and refrigerate. To maintain that luscious texture, ensure it’s sealed well, preventing any air from compromising its quality. When you’re ready to serve, just add your toppings—whipped cream, chocolate shavings, or berries—right before slicing, and enjoy a wonderfully decadent treat that’s just as delightful as when freshly made!
Chef's Helpful Tips
- For the No-Bake Chocolate Tart, make sure to properly press the chocolate cookie crumb mixture into the tart pan to avoid a crumbly crust when serving.
- When heating the cream, keep a close eye and remove it from heat just before it begins to boil to maintain a smooth chocolate texture.
- Be patient while allowing the tart to chill; it needs at least four hours in the refrigerator for the filling to set properly.
- Lastly, consider using high-quality semi-sweet chocolate for a richer and more satisfying flavor in your tart.
No-Bake Chocolate Tart Recipe FAQs
How do I choose the best chocolate for my No-Bake Chocolate Tart?
Absolutely! When selecting chocolate, I highly recommend using high-quality semi-sweet chocolate. Look for a brand that uses real cocoa butter and has at least 60% cacao for depth of flavor. Avoid chocolate chips, as they often contain stabilizers that may not melt as well, affecting the smoothness of your tart filling.
What’s the best way to store my No-Bake Chocolate Tart?
You should keep your No-Bake Chocolate Tart tightly covered with plastic wrap or in an airtight container in the refrigerator for up to 5 days. This method keeps it fresh and prevents it from absorbing other odors in your fridge, allowing you to enjoy that delightful chocolate flavor each day!
Can I freeze my No-Bake Chocolate Tart?
Certainly! You can freeze your tart for up to 2 months. Wrap the tart tightly in plastic wrap, then follow with aluminum foil to prevent freezer burn. To thaw, simply transfer it to the refrigerator and let it sit overnight. This way, you’ll maintain the perfect creamy texture while enjoying a wonderfully chilled treat!
What if my filling doesn’t set properly?
No worries! If your filling doesn’t set after the recommended chilling time, it might be due to the cream not being hot enough when you added the chocolate. To troubleshoot, I suggest placing the tart back in the fridge and letting it chill for an extra hour or two. If you’re still facing issues, you can gently reheat it in a saucepan, ensuring it’s warm but not boiling, and then let it cool again before refrigenerating.
Can I make this tart gluten-free?
Yes, you can absolutely make a gluten-free version of the No-Bake Chocolate Tart! Just substitute the chocolate cookie crumbs with gluten-free cookie crumbs or even crushed gluten-free graham crackers. Ensure that all other ingredients you use are certified gluten-free to cater to those with dietary restrictions.
What can I use as a topping if I don’t have whipped cream?
Very easy! If you don’t have whipped cream on hand, you can use a dollop of Greek yogurt for a tangy twist, or try a layer of mascarpone cheese whipped lightly with sugar and vanilla. Both options bring a lovely creaminess to the tart. You can also top it with a sprinkle of cocoa powder or crushed nuts for an extra crunch!
No-Bake Chocolate Tart
Ingredients
- 1 cup chocolate cookie crumbs
- 4 tablespoons unsalted butter melted
- 1 cup heavy cream
- 8 ounces semi-sweet chocolate chopped
- 1/4 cup powdered sugar
- 1 teaspoon vanilla extract
- 1 pinch salt
- 1 cup whipped cream
- 1/4 cup chocolate shavings
- 1 cup fresh berries
Method
- Combine the chocolate cookie crumbs and melted butter in a mixing bowl, stirring until evenly coated.
- Press the mixture firmly into the bottom and up the sides of a 9-inch tart pan.
- Place the crust in the refrigerator for 10-15 minutes to set.
- In a small saucepan over medium heat, bring the heavy cream to a simmer, removing from heat before boiling.
- Add the chopped semi-sweet chocolate to the hot cream and let it sit for 2-3 minutes to soften.
- Whisk the mixture until smooth, then stir in the powdered sugar, vanilla extract, and salt.
- Pour the chocolate filling into the prepared crust and spread evenly.
- Cover the tart with plastic wrap and refrigerate for at least 4 hours until set.
- Once set, remove the tart from the refrigerator and top with whipped cream, chocolate shavings, and fresh berries.
- Slice the tart and serve chilled.

Leave a Comment