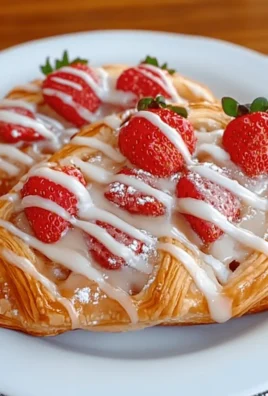
The smooth, creamy texture of Vanilla Pudding Cups brings a wave of nostalgia that transports me back to my childhood. There’s something truly comforting about the gentle simmer of milk and sugar on the stove, a sweet promise of dessert perfection wafting through the air. I discovered this recipe during a cozy afternoon spent dusting off old cookbooks, and the simplicity of its ingredients immediately caught my eye.

It’s the ideal antidote for anyone exhausted by fast food—this elegant treat requires just a few pantry staples, yet it feels like a luxurious indulgence. Whether you’re hosting a dinner party or simply treating yourself, these pudding cups are incredibly versatile. They can be enjoyed plain or dressed up with a dollop of whipped cream or seasonal fruits. Best of all, they come together in just about 40 minutes, making it easy to satisfy your sweet tooth without hours in the kitchen. Dive in and experience the delightful creaminess of homemade vanilla pudding!
Why You'll Love This Vanilla Pudding Cups
- This Vanilla Pudding Cups recipe is not only simple but also a quick treat that can be whipped up in just 40 minutes.
- With its rich and creamy texture, each cup is a burst of nostalgia, offering a delightful flavor that everyone will adore.
- The versatility of this dessert means you can enjoy it on its own or elevate it with toppings like fresh fruit or whipped cream for a stunning presentation.
- It’s sure to please a crowd, making it a perfect choice for gatherings or special occasions.
Vanilla Pudding Cups Ingredients
For the Pudding Base
• Whole milk – provides the creamy foundation for your vanilla pudding cups.
• Granulated sugar – sweetens the pudding, making it a delightful treat.
• Cornstarch – acts as a thickening agent for that perfect pudding consistency.
• Salt – enhances the flavors, balancing the sweetness.
• Vanilla extract – infuses a lovely aromatic flavor that’s essential for vanilla pudding cups.
• Unsalted butter – adds richness and a velvety finish to the pudding.
Feel free to get creative with this classic and bring a taste of nostalgia into your kitchen!

How to Make Vanilla Pudding Cups
-
Whisk Together
In a medium saucepan, whisk together the granulated sugar, cornstarch, and salt until well combined. This foundation is key for a smooth and creamy pudding. -
Add Milk Gradually
Gradually whisk in the whole milk, ensuring that there are no lumps. This step helps to integrate the ingredients and begins the transformation into pudding. -
Heat and Whisk Continuously
Place the saucepan over medium heat and continuously whisk until the mixture starts to thicken and comes to a gentle boil, about 5–7 minutes. Watch for bubbles to form on the surface. -
Cook Further
Once boiling, continue to cook for an additional 2 minutes, stirring constantly. This ensures your pudding reaches the right texture and richness. -
Stir in Flavors
Remove the saucepan from heat and stir in the vanilla extract and unsalted butter until the butter is melted and the mixture is smooth. The aroma will be heavenly! -
Pour into Cups
Carefully pour the pudding into individual serving cups or bowls. This is the moment where you can already envision the deliciousness ahead. -
Cool Down
Let the pudding cool at room temperature for about 10 minutes. Afterward, cover each cup with plastic wrap pressed directly onto the surface, then refrigerate for at least 20 minutes or until chilled. -
Serve and Enjoy
Serve chilled, plain or topped with whipped cream, fresh fruit, or chocolate shavings. The choice of toppings can elevate your pudding experience!
Optional: Garnish with a sprinkle of cocoa powder for an extra delicious touch.
Exact quantities are listed in the recipe card below.
What to Serve with Vanilla Pudding Cups?
Looking to create a delightful meal or dessert spread? Here are some perfect pairings to bring out the best in your Vanilla Pudding Cups.
-
Fresh Berries: A medley of strawberries, blueberries, or raspberries adds a burst of freshness, balancing the creaminess of pudding beautifully. Their natural sweetness complements the vanilla flavor perfectly.
-
Whipped Cream: Light and airy, a fluffy dollop of whipped cream can elevate your pudding cups to a new level of indulgence.
-
Chocolate Shavings: Adding a sprinkle of rich chocolate shavings introduces a decadent contrast that makes each bite feel like a special occasion.
-
Shortbread Cookies: The buttery crunch of shortbread cookies creates a delightful textural contrast to the smooth pudding, turning dessert into a fun experience.
-
Caramel Sauce: Drizzling warm caramel sauce over your pudding brings a rich, buttery flavor that enhances the sweetness and adds a sticky, luscious quality.
-
Almond Croissants: For a more elaborate pairing, sliced almond croissants provide a delightful crunch and nutty flavor that perfectly harmonizes with the vanilla pudding.
-
Espresso or Coffee: A warm cup of espresso or coffee balances the sweetness of dessert with its bold flavors, creating a satisfying dessert experience.
-
Coconut Whipped Cream: For a tropical twist, coconut whipped cream brings a light, airy, and fragrant flavor, making your vanilla pudding extra special.
Each of these pairings not only enhances the flavor profile of the pudding but also brings an inviting touch to your dessert table!
Make Ahead Options
These Vanilla Pudding Cups are perfect for busy home cooks who want to save time without sacrificing flavor! You can prepare the pudding mixture up to 24 hours in advance; simply follow the first five steps of the recipe and then pour the mixture into cups. After cooling at room temperature for about 10 minutes, cover each cup tightly with plastic wrap and refrigerate them. When you’re ready to serve, just chill the pudding cups for at least 20 minutes and finish them off with your favorite toppings like whipped cream or fresh fruit for that delightful finishing touch. Trust me, they’ll taste just as delicious as if made fresh!
How to Store and Freeze Vanilla Pudding Cups
Room Temperature: Keep your vanilla pudding cups at room temperature for up to 2 hours. After this period, refrigerate to maintain freshness and prevent spoilage.
Fridge: Store in the refrigerator for up to 3 days. Ensure each cup is tightly covered with plastic wrap or a lid to keep the pudding creamy and prevent it from absorbing odors.
Freezer: For longer storage, freeze the pudding cups for up to 2 months. Wrap each cup in plastic wrap and then foil to prevent freezer burn.
Reheating: Thaw frozen pudding in the fridge overnight. If it thickens too much, whisk in a little milk before serving, restoring that delightful creamy consistency.
Vanilla Pudding Cups Variations
Get ready to customize your Vanilla Pudding Cups in delightful ways that will definitely excite your palate!
-
Almond Milk: Swap whole milk for almond milk for a nutty flavor and creamy texture. It’s a lovely dairy-free twist that many will enjoy.
-
Chocolate Drizzle: Melt dark chocolate and drizzle over cooled pudding for an indulgent touch. This rich addition will satisfy any chocolate lover’s craving.
-
Coconut Cream: Replace the butter with coconut cream for a tropical flavor that enhances the pudding’s creaminess beautifully. A taste of the islands, it’s a delightful surprise!
-
Custard Base: Use egg yolks in addition to cornstarch for a traditional custard base. This variation gives an extra richness that elevates each spoonful.
-
Citrus Zest: Add lemon or orange zest while cooking for a bright, refreshing flavor that balances the sweetness wonderfully. It’s a zesty uplift that your taste buds will adore!
-
Spiced Variation: Infuse your pudding with a pinch of cinnamon or nutmeg during cooking for a warm, cozy vibe. This little adjustment makes it perfect for chilly evenings.
-
Savory Twist: Consider adding a touch of sea salt and a dash of black pepper for an unexpected savory kick. It provides a sophisticated twist that adults will find intriguing.
-
Fruit Swirl: Before chilling, gently fold in your favorite pureed fruit like mango or raspberry for a vibrant burst of flavor and stunning color. This twist not only tastes fantastic but also makes a beautiful presentation!
Chef's Helpful Tips
- When making Vanilla Pudding Cups, ensure you whisk the cornstarch and sugar thoroughly to prevent lumps from forming when you add the milk.
- Always add the milk gradually while whisking to maintain a smooth consistency and avoid clumping.
- Continuously whisk over medium heat until the pudding thickens, watching closely to prevent burning at the bottom of the pan.
- Once it reaches a gentle boil, cook for the full two minutes to achieve that perfect texture you want for your pudding.
Vanilla Pudding Cups Recipe FAQs
How do I choose the right milk for Vanilla Pudding Cups?
Absolutely! Using whole milk is ideal for achieving that rich and creamy texture. If you’re looking for a lighter option, you can substitute with 2% milk, but be aware that the pudding may be slightly thinner. For a dairy-free alternative, almond or coconut milk can also work, but may alter the taste and consistency.
How long can I store Vanilla Pudding Cups in the refrigerator?
Very! You can keep your Vanilla Pudding Cups in the refrigerator for up to 3 days. Just ensure each cup is wrapped tightly with plastic wrap or has a lid to maintain moisture and prevent them from absorbing any fridge odors.
Can I freeze Vanilla Pudding Cups?
Sure! For freezing, wrap each pudding cup in plastic wrap, then in aluminum foil to prevent freezer burn. They can be frozen for up to 2 months. When you’re ready to enjoy them, thaw the pudding in the refrigerator overnight. If the texture appears too thick, simply whisk in a little milk until creamy again!
What if my pudding doesn’t thicken properly?
Don’t worry! If your pudding doesn’t thicken, it might be due to the cooking time being too short or not enough whisking. To troubleshoot, try placing the saucepan back on medium heat, whisking constantly until you see the pudding start to thicken. You can also add a touch more cornstarch, mixing it with a little cold milk beforehand to avoid lumps. Remember, patience is key!
Are there any dietary considerations for Vanilla Pudding Cups?
Absolutely! For those with dairy allergies, you can use lactose-free milk or plant-based milk like almond or soy. If you’re concerned about sugar intake, feel free to experiment with sugar substitutes like stevia or monk fruit sweetener, keeping in mind that the flavor and texture may vary slightly. Just make sure to check the conversion ratio for substitutes.
Vanilla Pudding Cups
Ingredients
- 2 cups Whole milk provides the creamy foundation
- 3/4 cup Granulated sugar sweetens the pudding
- 1/4 cup Cornstarch thickens the pudding
- 1/4 teaspoon Salt enhances flavors
- 1 teaspoon Vanilla extract infuses aromatic flavor
- 2 tablespoons Unsalted butter adds richness
Method
- In a medium saucepan, whisk together the granulated sugar, cornstarch, and salt until well combined.
- Gradually whisk in the whole milk, ensuring that there are no lumps.
- Place the saucepan over medium heat and continuously whisk until the mixture starts to thicken and comes to a gentle boil, about 5–7 minutes.
- Once boiling, continue to cook for an additional 2 minutes, stirring constantly.
- Remove the saucepan from heat and stir in the vanilla extract and unsalted butter until smooth.
- Carefully pour the pudding into individual serving cups or bowls.
- Let the pudding cool at room temperature for about 10 minutes, then cover with plastic wrap and refrigerate for at least 20 minutes.
- Serve chilled, plain or with toppings.

Leave a Comment